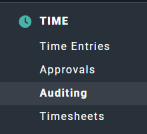
To audit time entries in Ruddr, simply click on the Auditing sub-menu item (Figure 1) in the Time area in the nav bar. All workspace members can get to the time auditing screen (Figure 2) to manage their own time entries. Depending on their assigned security role, members may also be able to view and administer time entries of other workspace members.
Select Auditing to Administer Time Entries

Figure 1 - Select Auditing to Administer Time Entries
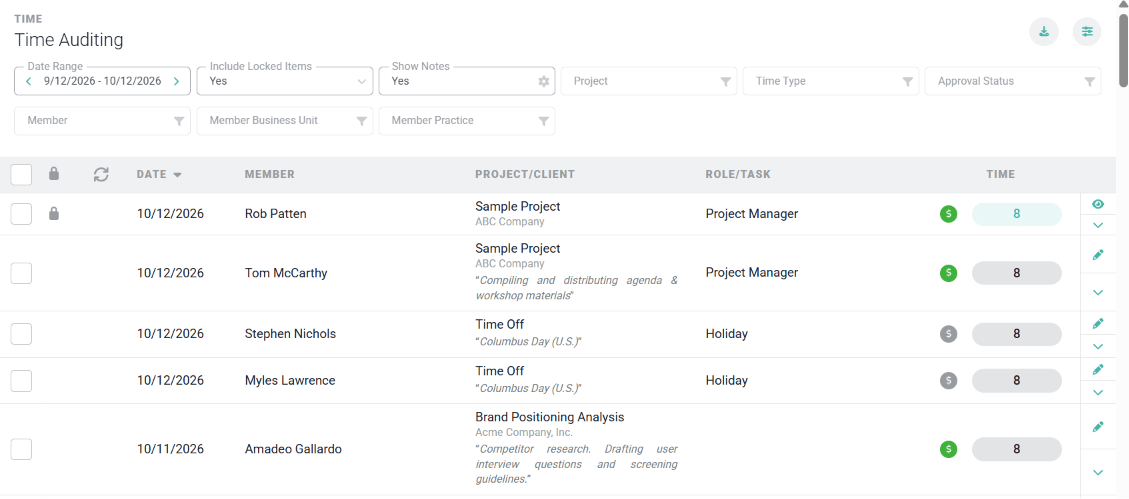
Time Auditing screen with Show Notes set to Yes, showing each entry's notes below its project and client

Figure 2 - Administer Multiple Time Entries from the Time Auditing Screen

Use the filters at the top of the screen to narrow the list of time entries. To see each entry’s notes, set the Show Notes filter to Yes (Figure 2). Notes appear below the entry’s project and client, or below its time type for non-project time. When Show Notes is set to Yes, exporting the list to CSV or Excel also includes a Notes column. If the member’s security role has the View time and expenses for member permission or the View time entries and expense items on these projects project permission, the member will be able to view the time entries those permissions cover. If the member’s security role has the Administer time and expenses for member permission or the Administer and approve time entries and expense items on these projects project permission, the member will be able to edit or delete the time entries those permissions cover, unless those entries are on a published invoice in which case they will appear locked. For more information regarding View / Administer time and expense permissions, view the Security Roles article in the Ruddr Help Center. When the member is designated as a time off approver, the member will be able to view time off entries where the member is set as the approver. If the time off entry is not locked, the member will also be able to make edits. For more information, see the time entry locking article.

Bulk updates

To complete bulk updates for time entries, select the time entries using the check boxes on the far left (Figure 3). Once you select multiple time entries, you will see a Bulk Actions button in the bottom right of the screen. Click the arrow next to the button to see the actions you can take: Set approval status (if you can approve time), Set role, and Delete. There is a limit to how many time entries you can select at once; Ruddr lets you know if you reach it.
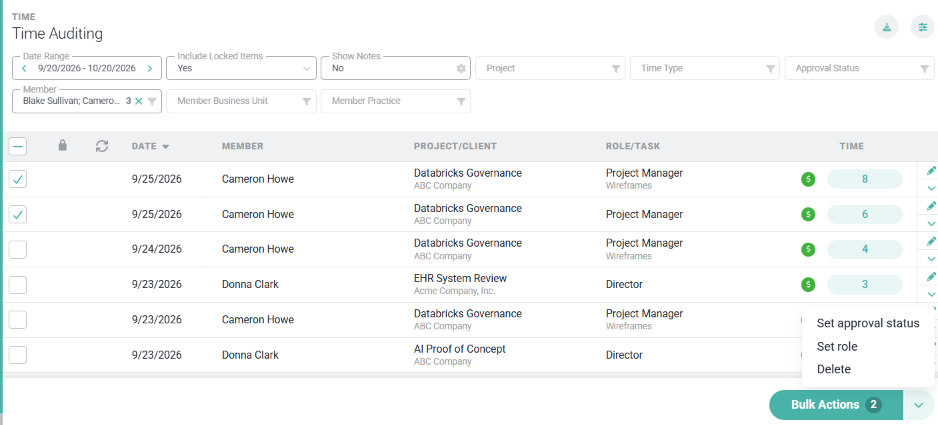
Selected time entries on the Time Auditing screen with the Bulk Actions menu open, showing Set approval status, Set role, and Delete

Figure 3 - Select Multiple Time Entries and Choose a Bulk Action

There will be times where locked time entries are presented on the Auditing screen. This lock will prevent you from applying bulk updates for these items (Figure 4). In these cases, you will see a lock icon next to the check box. Once you hover over the lock, it will give you a description of why that time entry was locked. For more on this, please refer to the Ruddr Help Center article Time Entry Locking.
A Padlock Icon Indicates a Locked Time Entry

Figure 4 - A Padlock Icon Indicates a Locked Time Entry

Every bulk action checks each selected time entry on its own. When the action finishes, a summary shows how many entries Succeeded, Failed, or were Skipped, and lists the outcome for each entry. Entries are skipped when you don’t have permission to change them, and they fail when they are locked or break a rule.

Set Approval Status

Use Set approval status to change the approval status of many time entries at once. This action only appears if your security role lets you approve time. In the Bulk Set Approval Status window, choose Not Submitted, Pending Approval, Approved, or Rejected (Figure 5). When you choose Rejected, enter a Reason (up to 255 characters). Ruddr notifies the members whose time was rejected, and the reason is saved in each entry’s history.
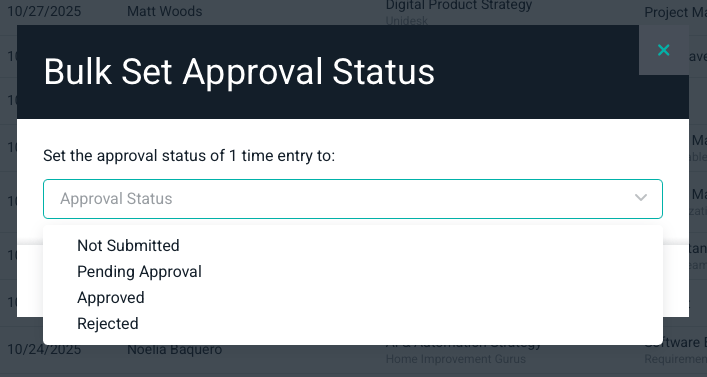
Bulk Set Approval Status window with the Approval Status list open, showing Not Submitted, Pending Approval, Approved, and Rejected

Figure 5 - Select the Approval Status to Apply
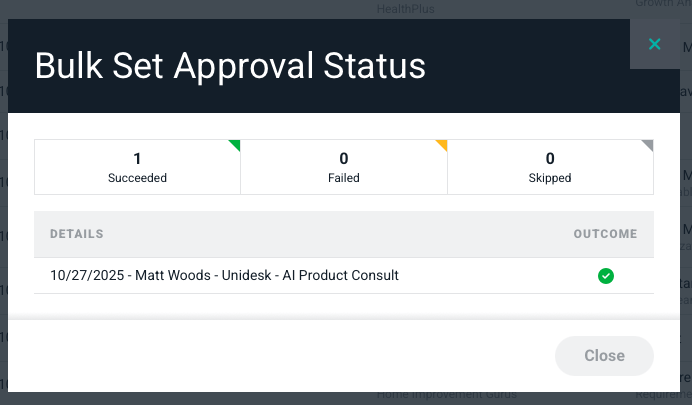
Setting the status this way applies it directly: it replaces any progress the entry had made through a multi-step approval workflow. Entries you can’t approve are skipped, as are entries that already have the selected status. Once the update completes, you will see the summary of your changes (Figure 6).
Bulk Set Approval Status summary showing 1 succeeded, 0 failed, and 0 skipped, with the outcome for each time entry

Figure 6 - Confirmation of Bulk Updates

Set Role

Use Set role to change the project role on many time entries at once. All of the selected entries must be on the same project, and that project must use roles. If the selection includes time off, entries from more than one project, or a project that doesn’t use roles, the Set role action is disabled and hovering over it explains why. To select the right entries, filter the list by Project before selecting them. Choose the new role in the Bulk Set Role window (Figure 7). Ruddr shows whether the role is billable or non-billable. Time entries without a billing override take on the new role’s billable setting and rate, so changing from a billable role to a non-billable one (or the reverse) changes the revenue on those entries. Entries with a billing override keep it.
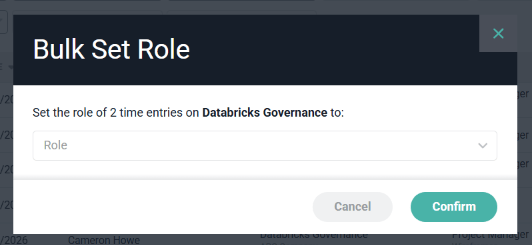
Bulk Set Role window asking which role to set on 2 time entries on the Databricks Governance project

Figure 7 - Choose the New Role for the Selected Time Entries

An entry is skipped if you can’t administer it or it already has the selected role. It fails if it is locked or the new role would break a project rule, such as:
  • The project only allows members to track time to roles they are assigned to, and the member isn’t assigned to the new role.
  • The entry’s task only accepts time from assigned members or roles, and neither the member nor the new role is assigned to it.
  • The new role has a billable or non-billable hours cap that the entry would exceed.
Each changed entry’s history records the old and new role.

Delete

Use Delete to remove many time entries at once. Ruddr asks you to confirm before deleting (Figure 8). Once you bulk delete, those items are permanently deleted and cannot be restored. Entries you can’t administer are skipped, and locked entries are not deleted.
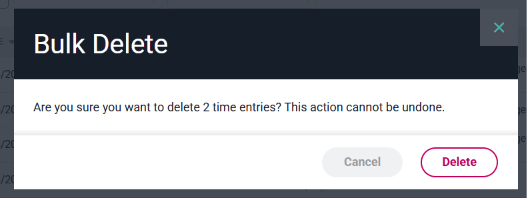
Bulk Delete window asking to confirm deleting 2 time entries, noting that the action cannot be undone

Figure 8 - Confirm the Bulk Deletion of Time Entries