

Downloading the Ruddr Mobile App
For iOS you will want to download the Ruddr app in the Apple App Store by searching for “Ruddr”. (Figure 1)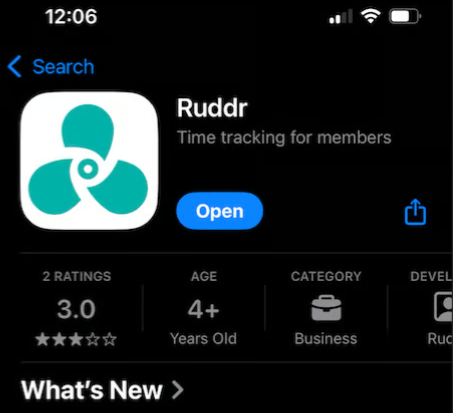
Figure 1 - The Ruddr App in the Apple App Store
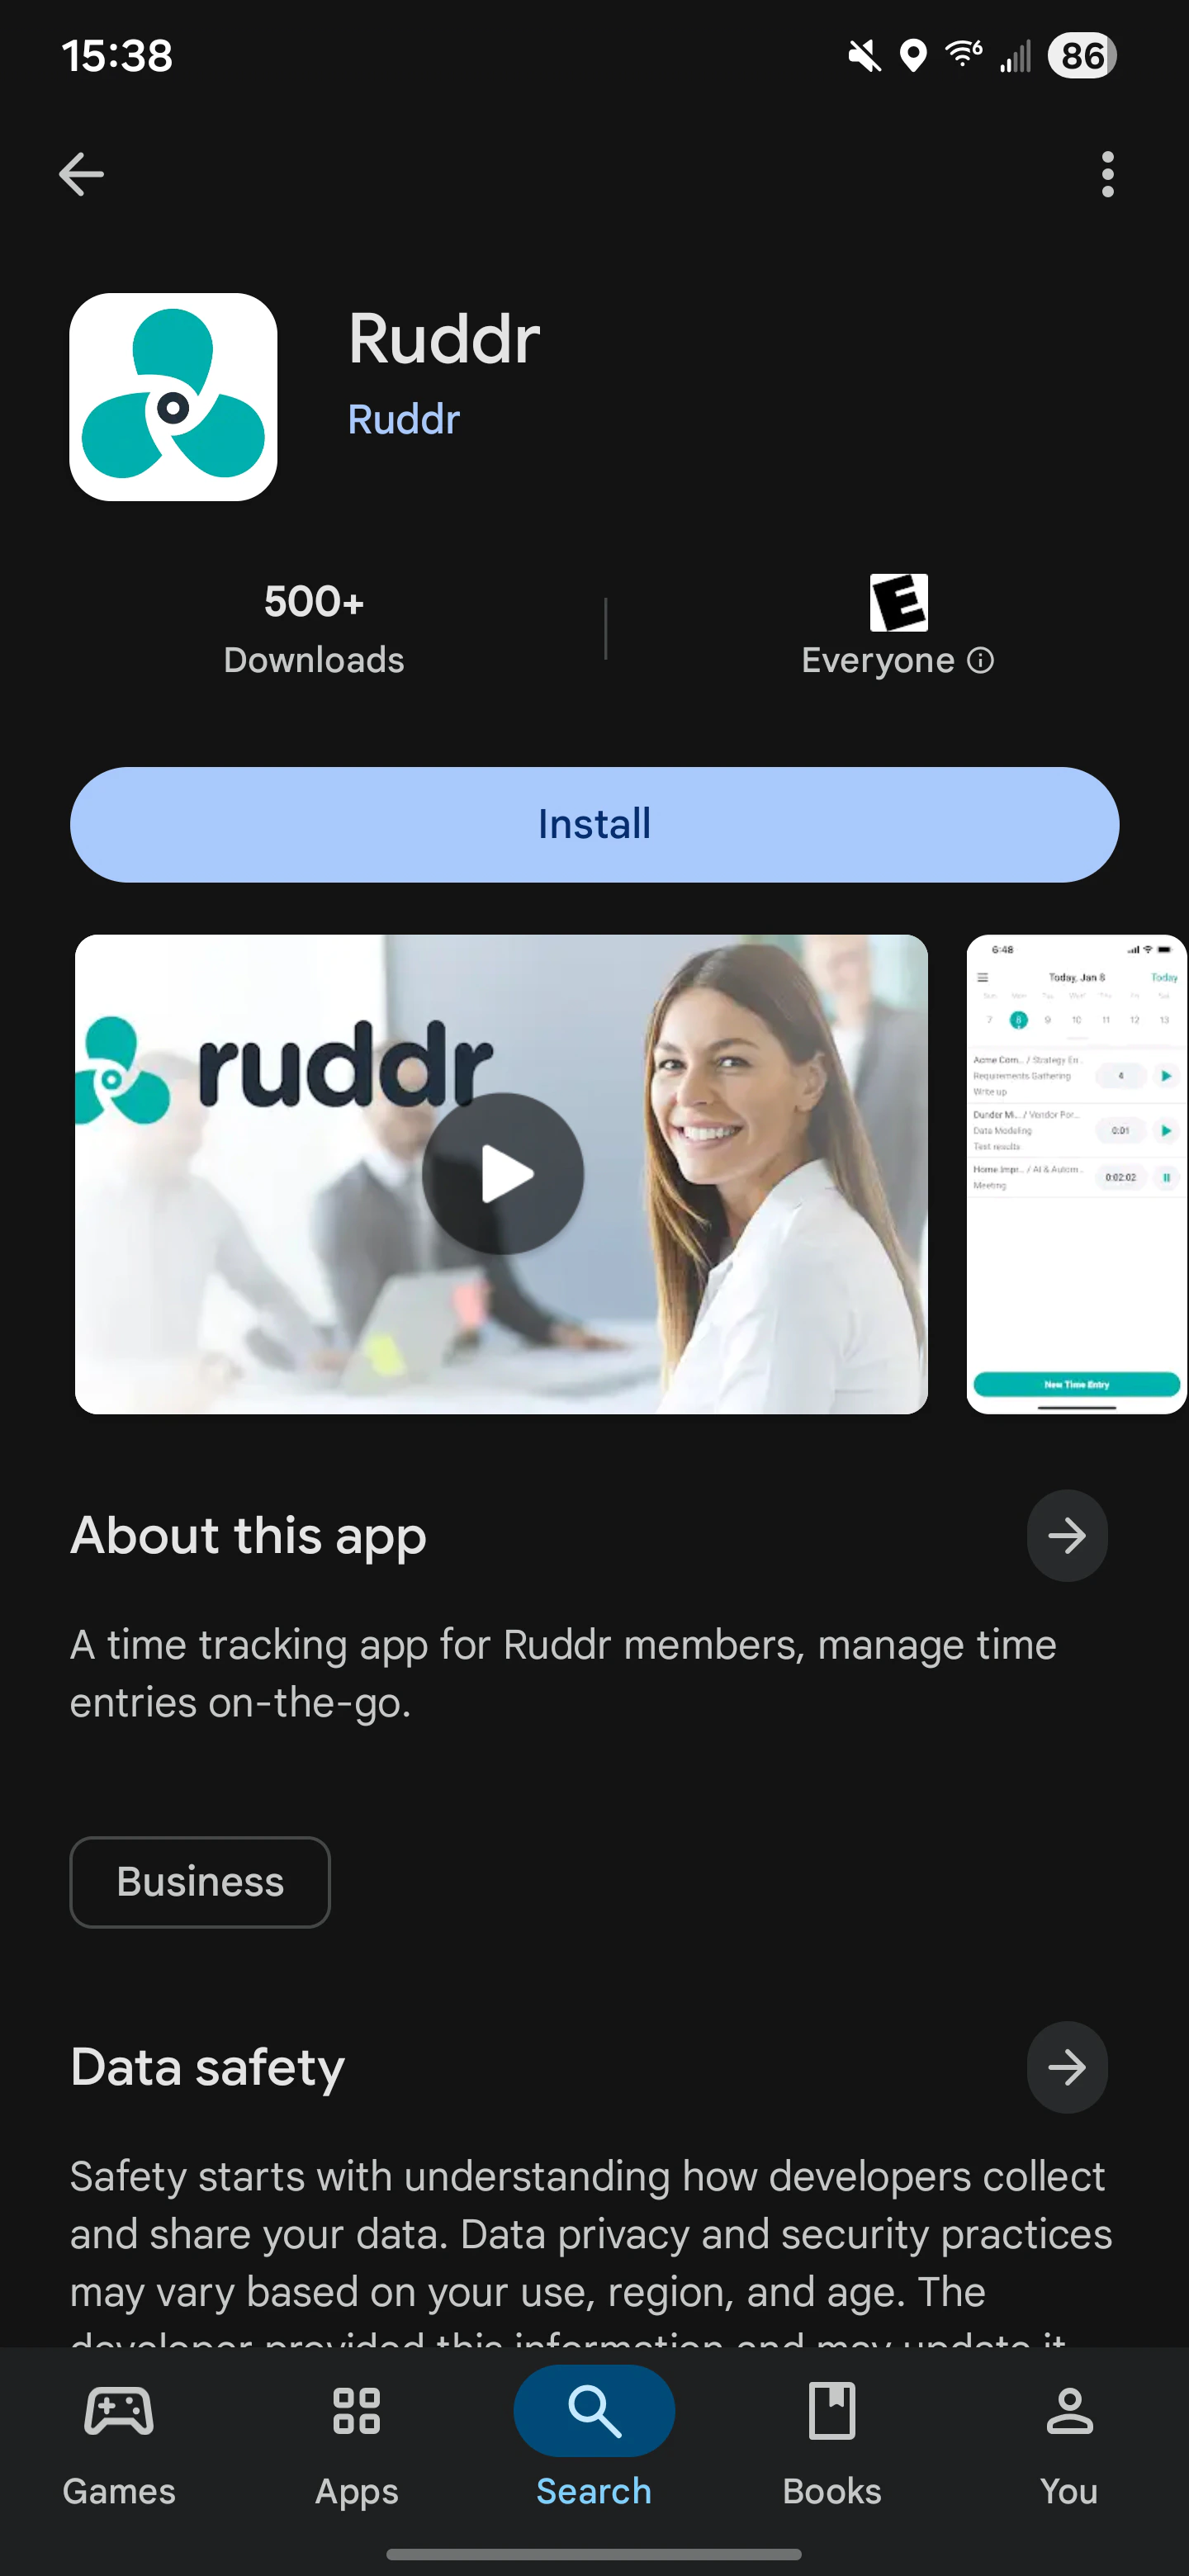
Figure 2 - Ruddr in the Google Play Store
Figure 3 - Home Screen to select the three lines to toggle between expenses and time entry
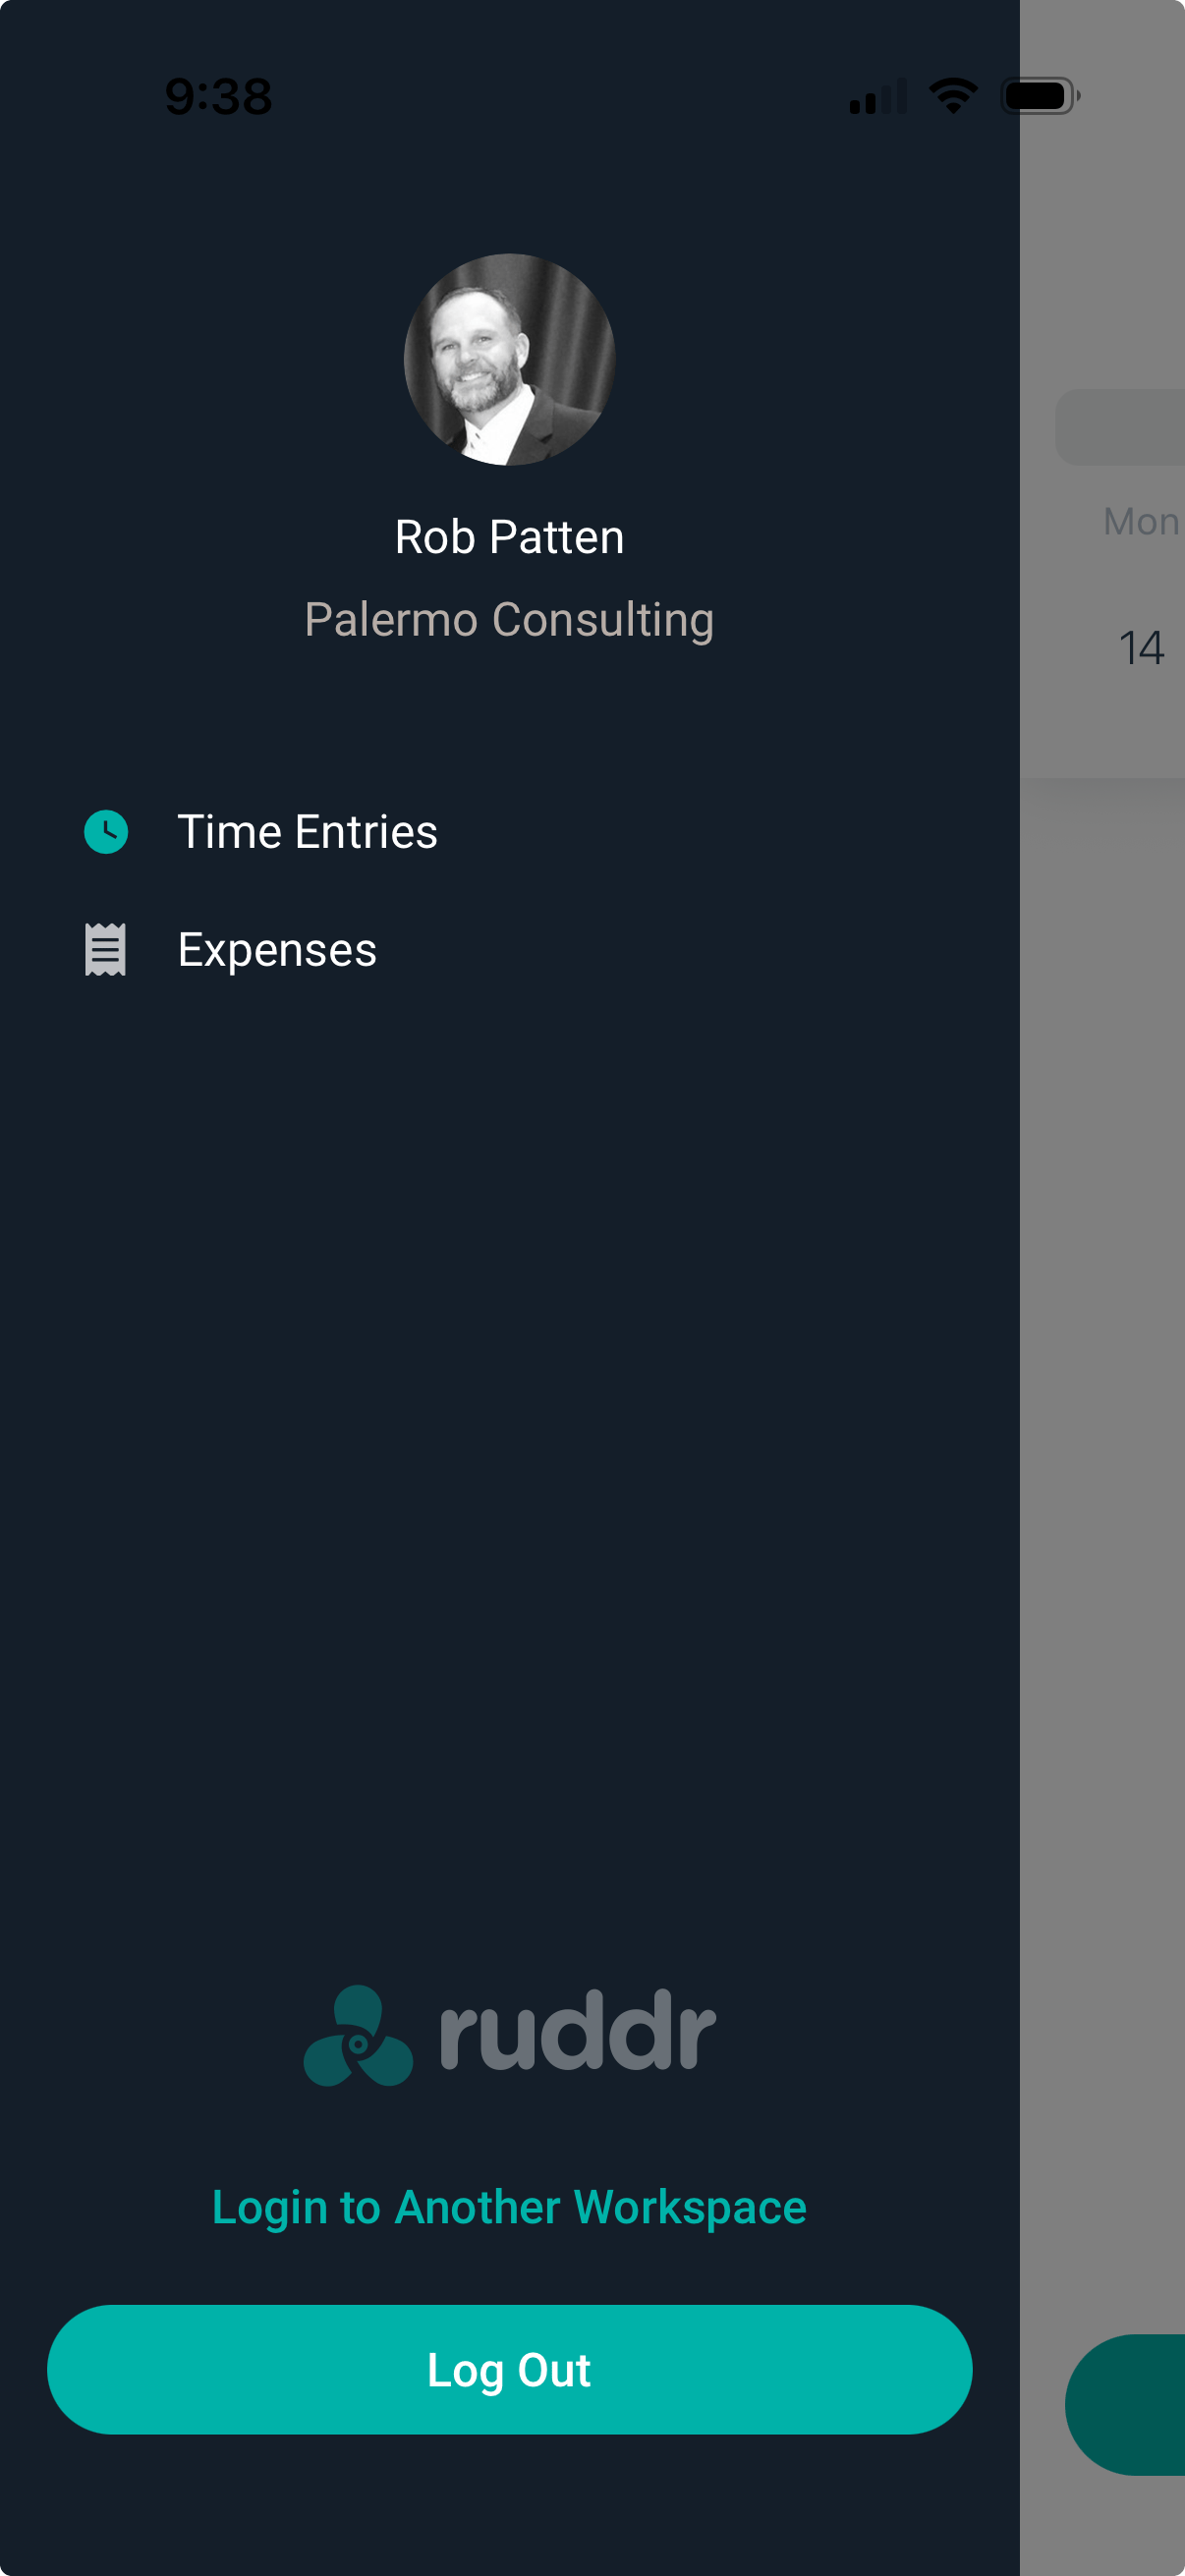
Figure 4 - Ability to toggle between time entries and expenses
Time Entries
When you open the Mobile App, the first screen will allow you to enter time by day. (Figure 5) Here you can edit the time entries or start the timer to track your time by pressing the play button next to any existing time entry. You can also toggle to other days on this screen by clicking on the date. The calendar week in the mobile app begins on Monday (Figure 5), which matches the ISO week used by the web app. A given week therefore covers the same seven days no matter which app you are working in.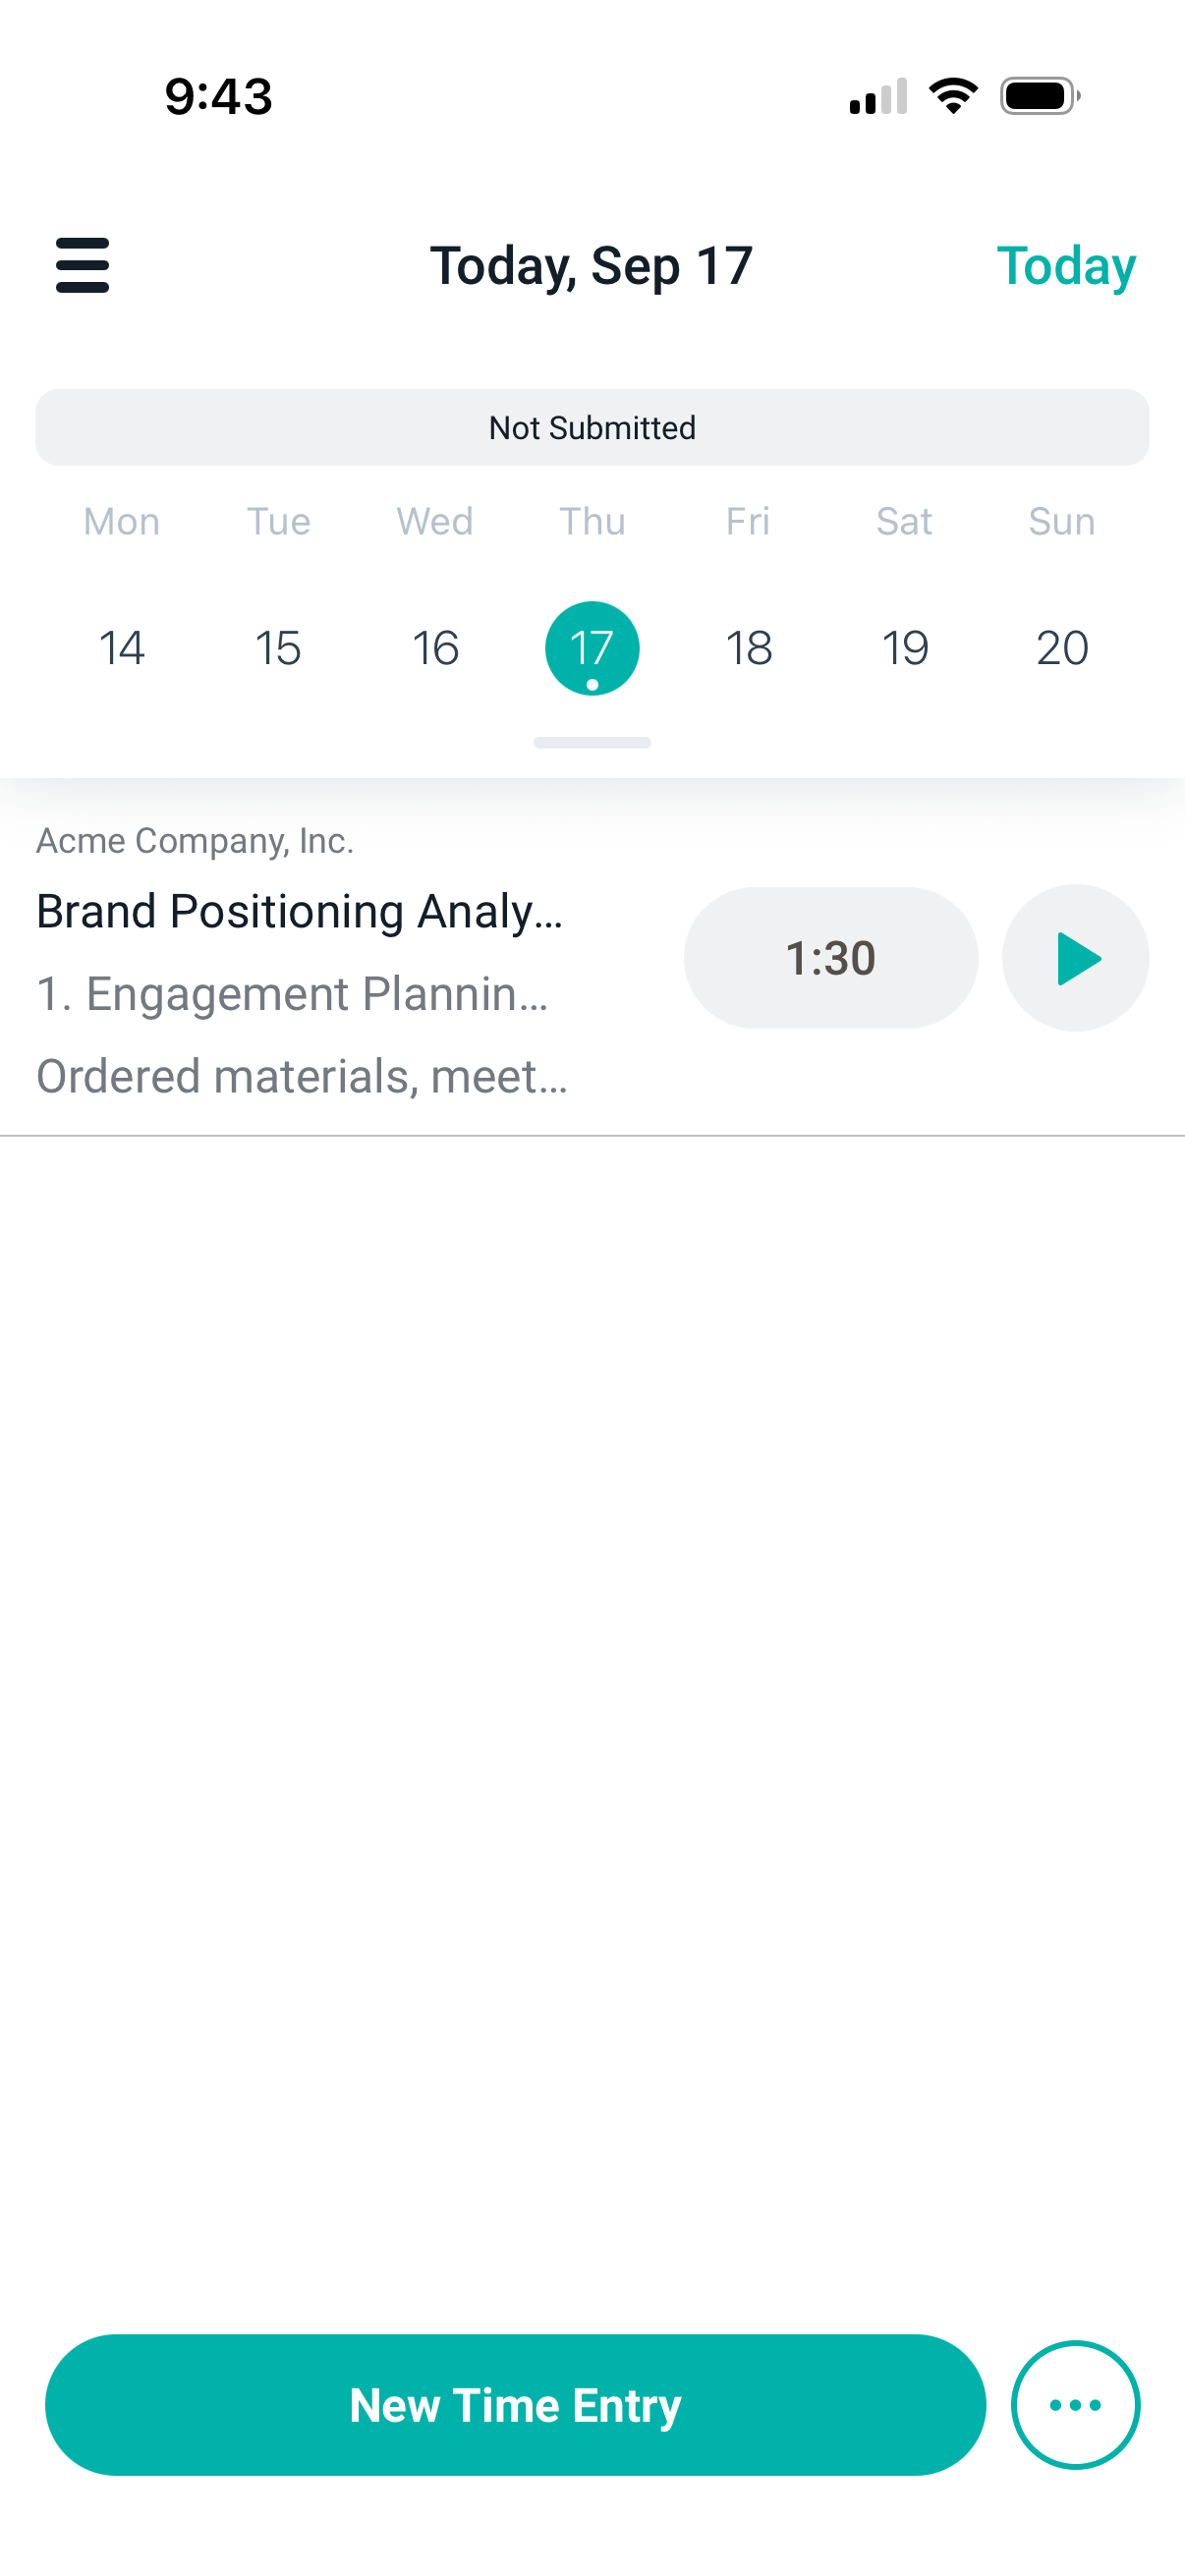
Figure 5 - Update time entries or begin a timer
Add or edit a time entry
If you need to add a new item, you can do so by clicking the New Time Entry button on the bottom of the app. You will be able to enter a new time entry, specifying either Project Time or Time Off as the time type. (Figure 6) The new time entry will default to project time, for which you can start a timer. If you just want to record the hours worked, you need to add hours to the time field and then you will have the option to save. To edit a time entry, select the time entry you want to edit and it will open the details. Make the edits needed and submit.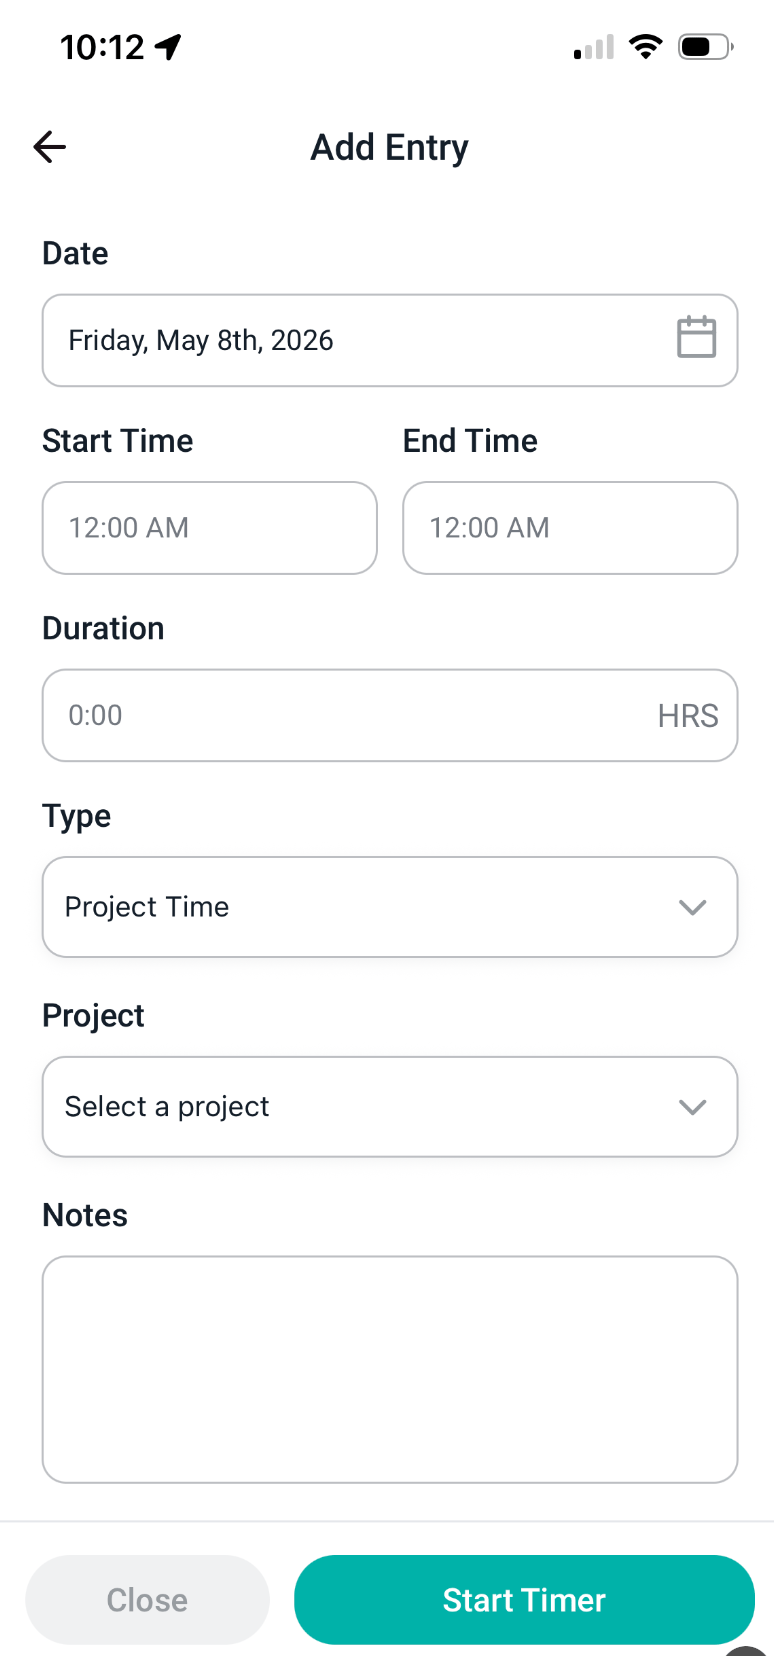
Figure 6 - How to add a new time entry in the mobile app
Rejected time entries
A time entry that an approver has rejected is shown with a red status, the same as in the web app. You can edit a rejected entry and resubmit it, and you can also start the timer on it to continue tracking against that entry. For more on what each status means, see the Time Entry Status article.Submitting Your Timesheet
You can submit your timesheet directly from the mobile app. Timesheets work the same way on both platforms. The Timesheets Overview article covers the underlying concepts: how time entries are grouped, what submission does, and when a timesheet can be unsubmitted. What you see on the time entry screen depends on whether the Timesheets feature is enabled in your workspace.When timesheets are enabled
A timesheet status bar appears above the calendar (Figure 7). The bar describes the week you are currently viewing:- Not Submitted - no timesheet covers any day of the week.
- Partially Submitted - a timesheet covers some, but not all, of the days in the week. Tap the information icon next to the status to see the days that are still open, listed as “Not Submitted: Thursday, 01/01/2026”.
- Submitted - a timesheet covers all seven days of the week.
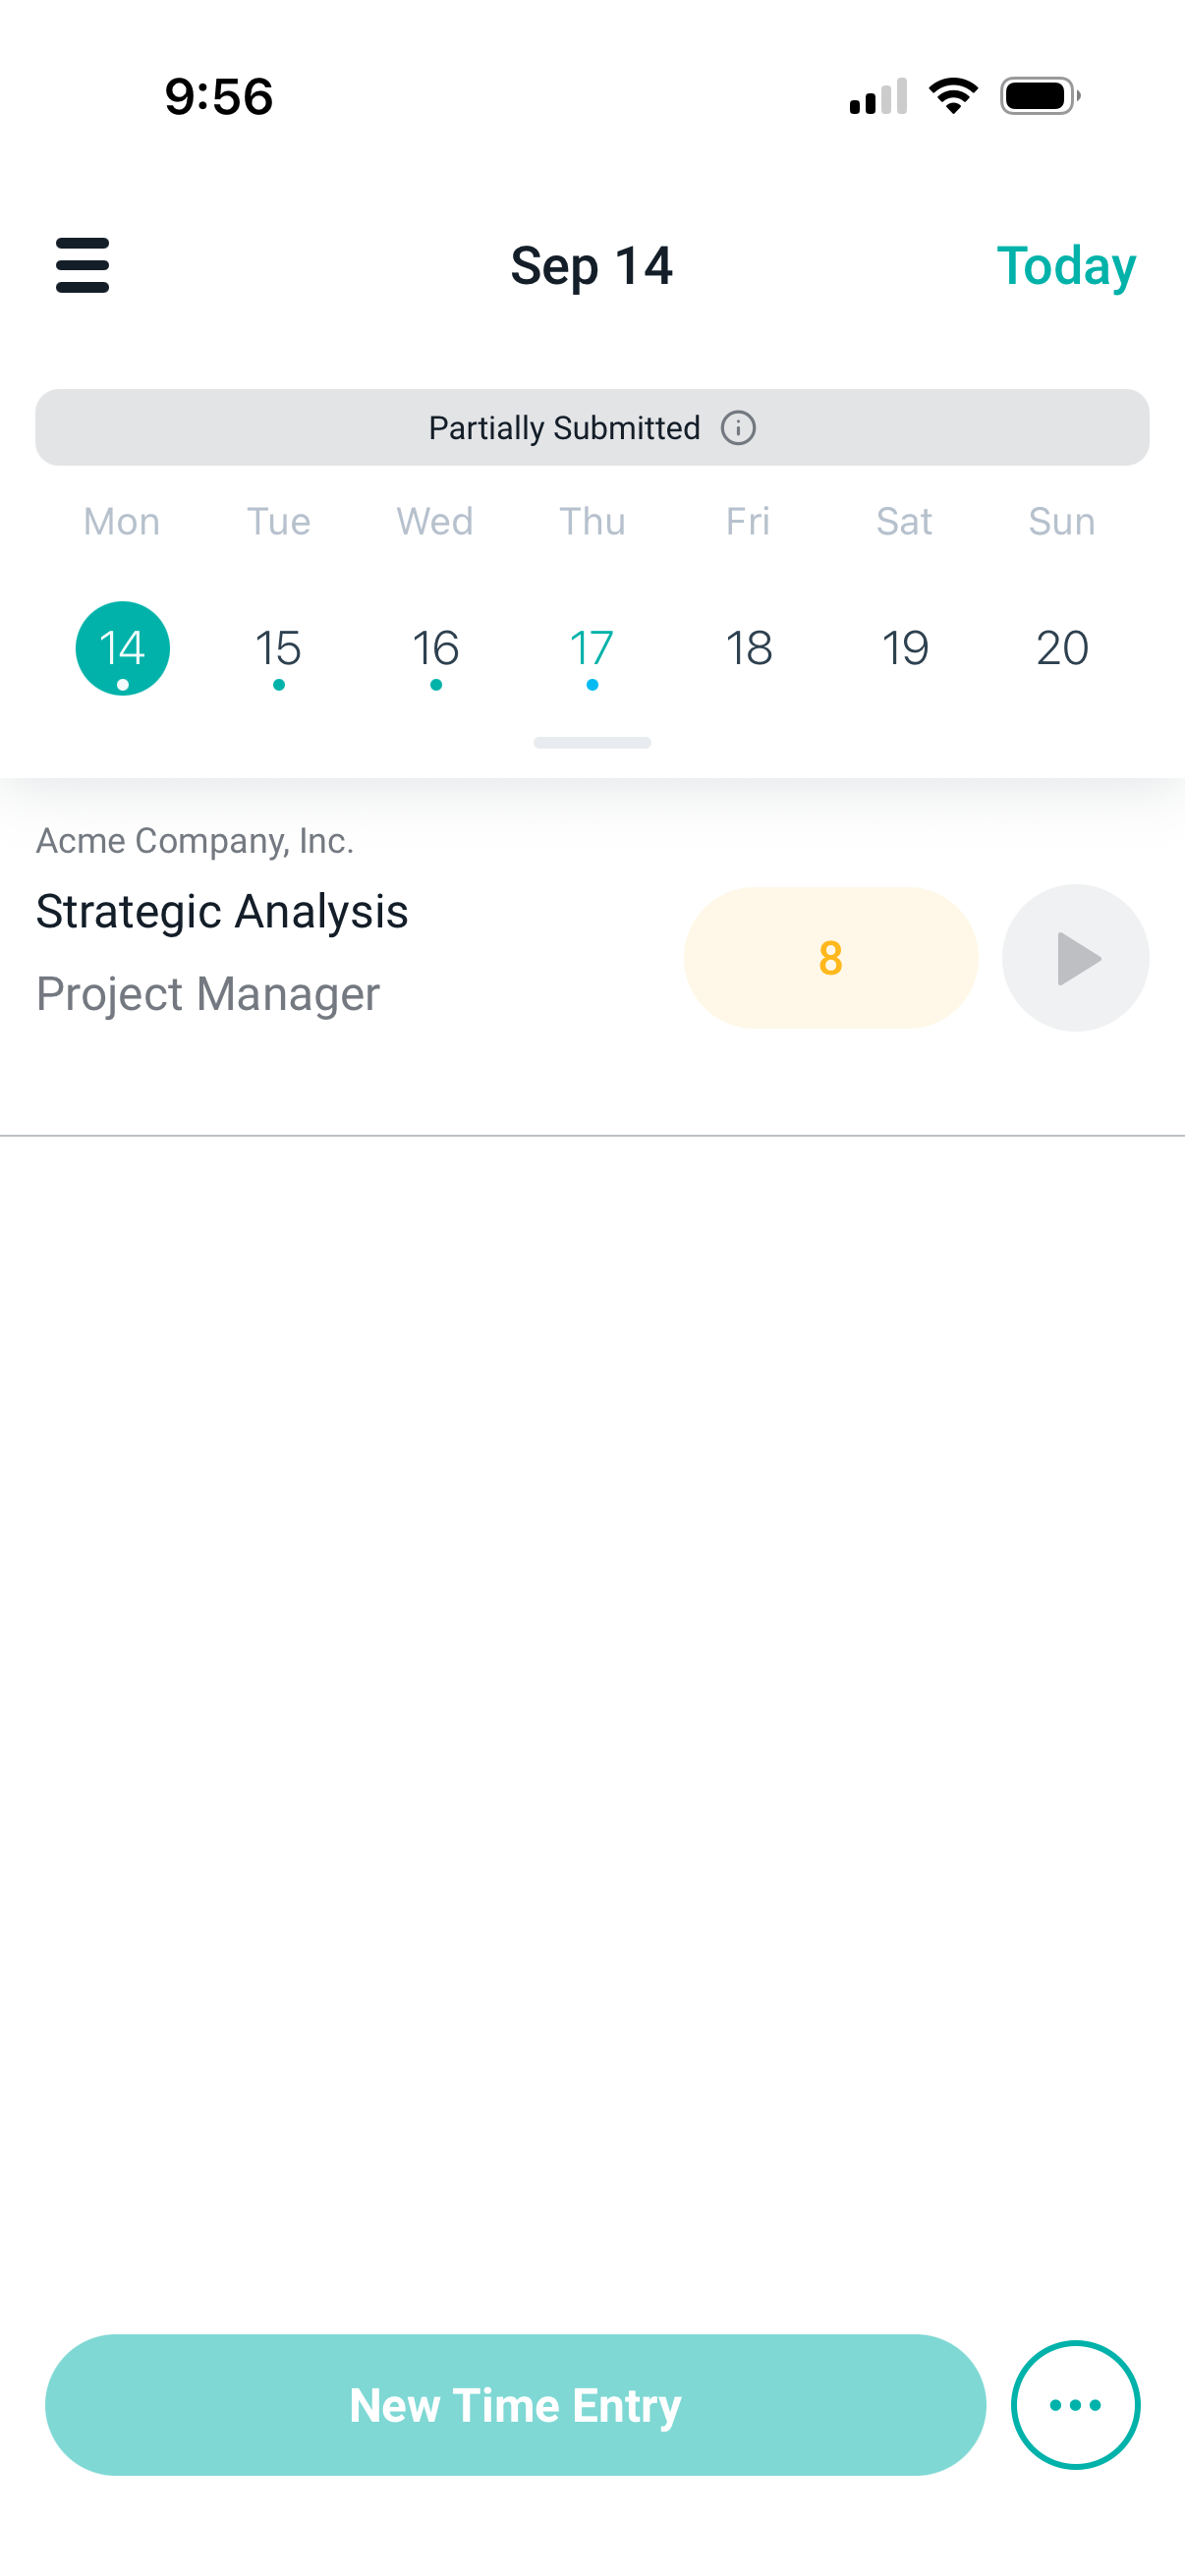
Figure 7 - The timesheet status bar showing a partially submitted week
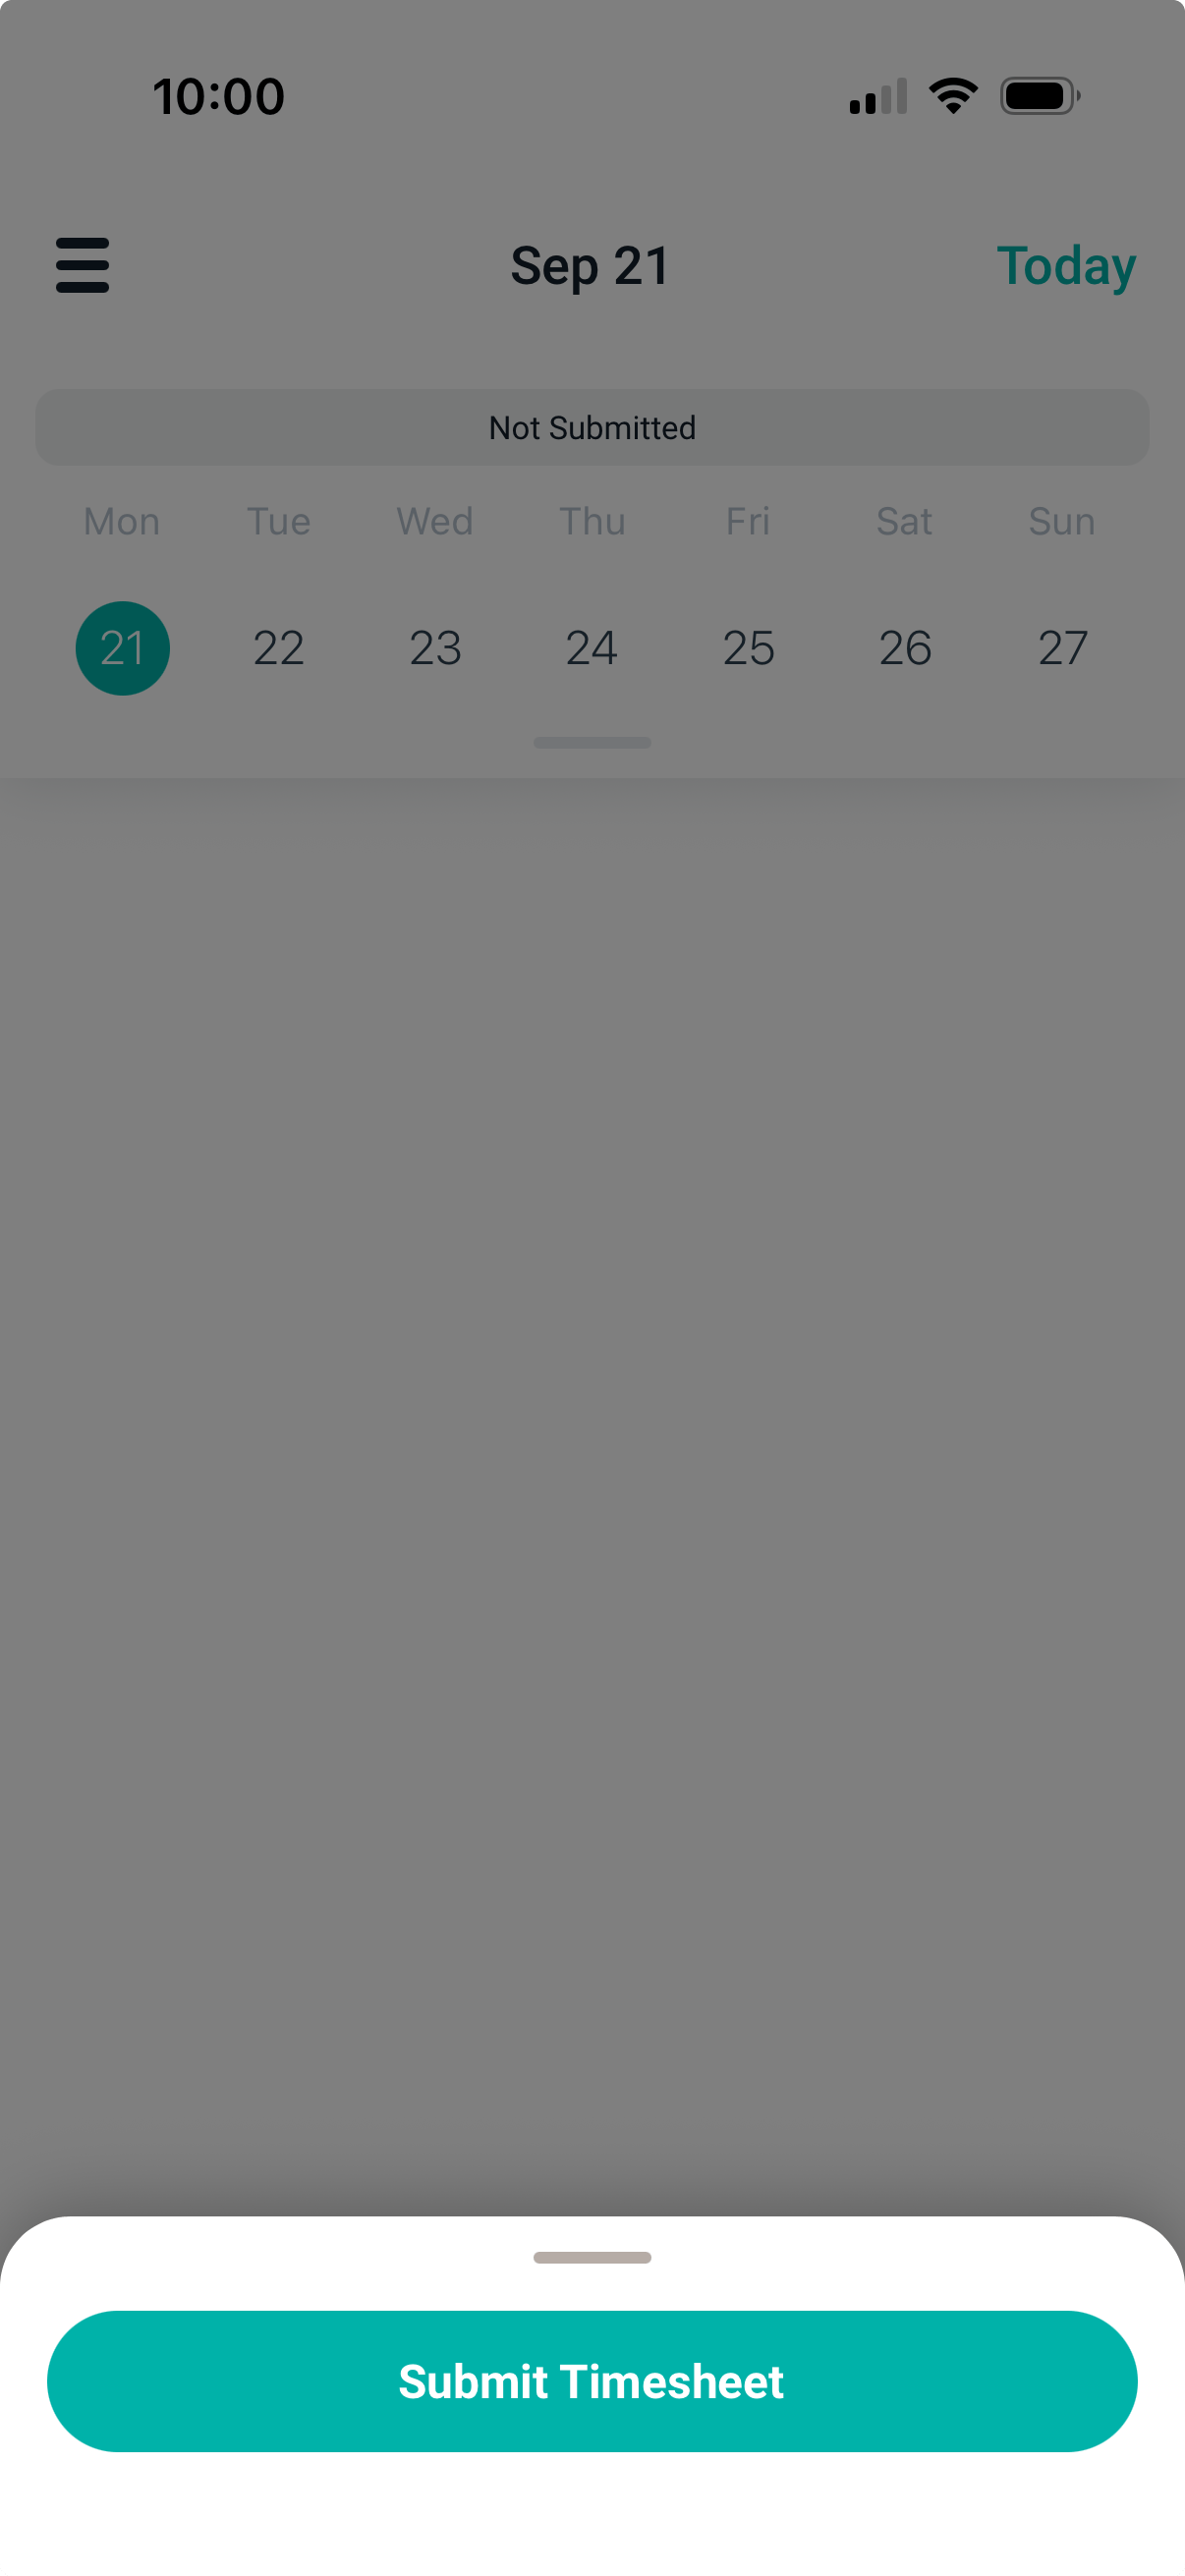
Figure 8 - Submitting a timesheet from the three-dot button
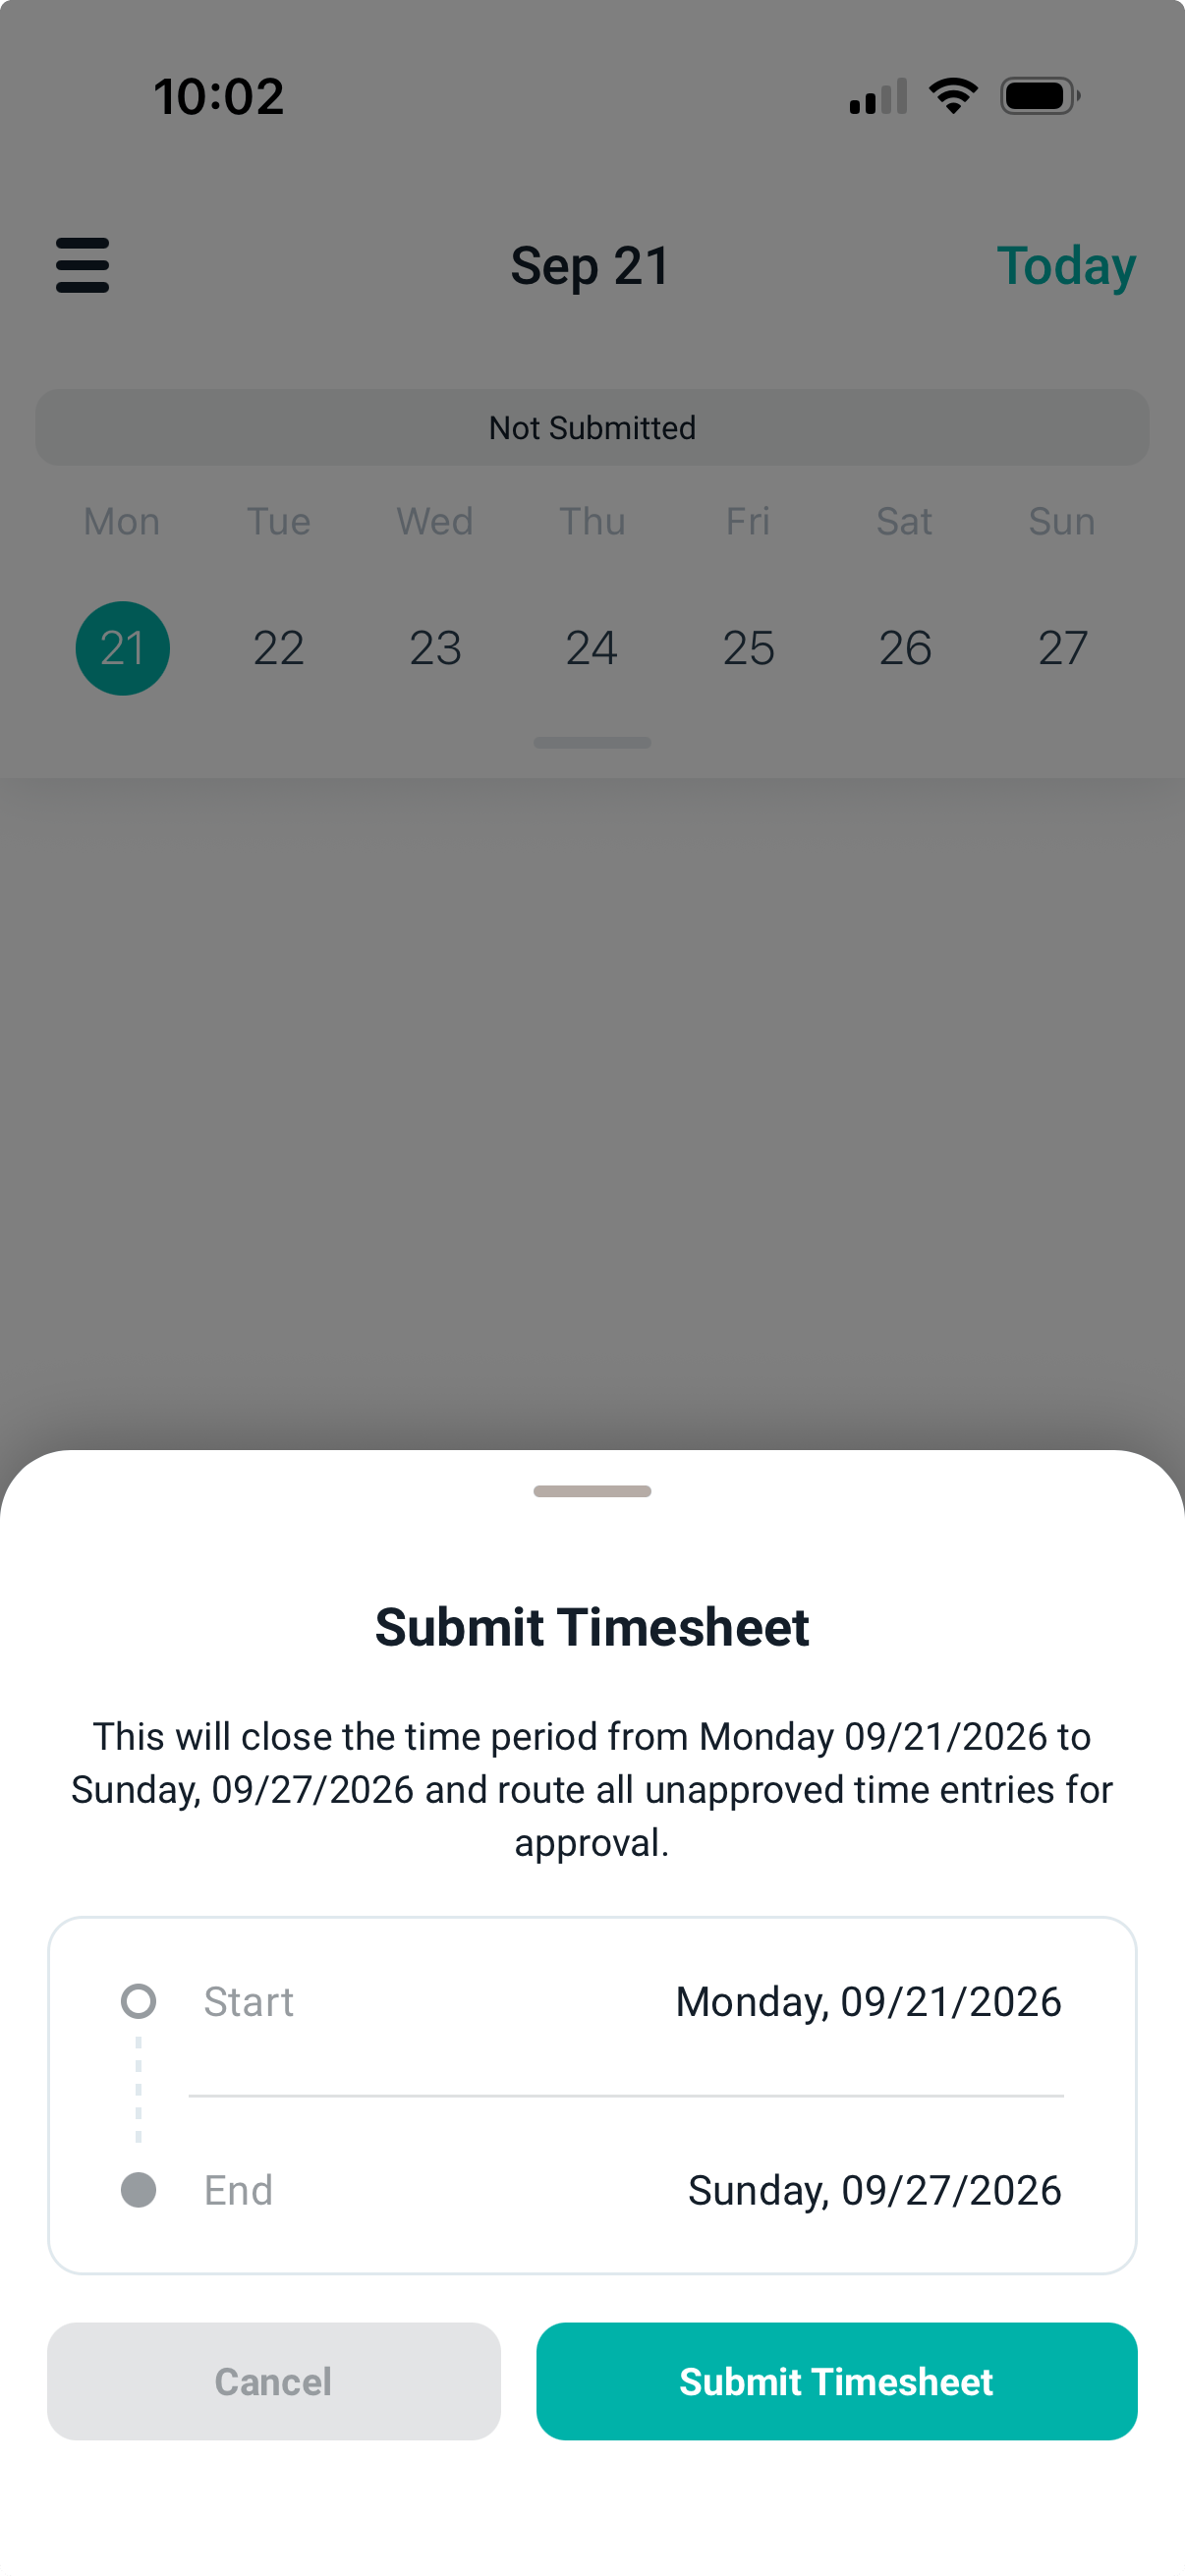
Figure 9 - The Submit Timesheet confirmation sheet
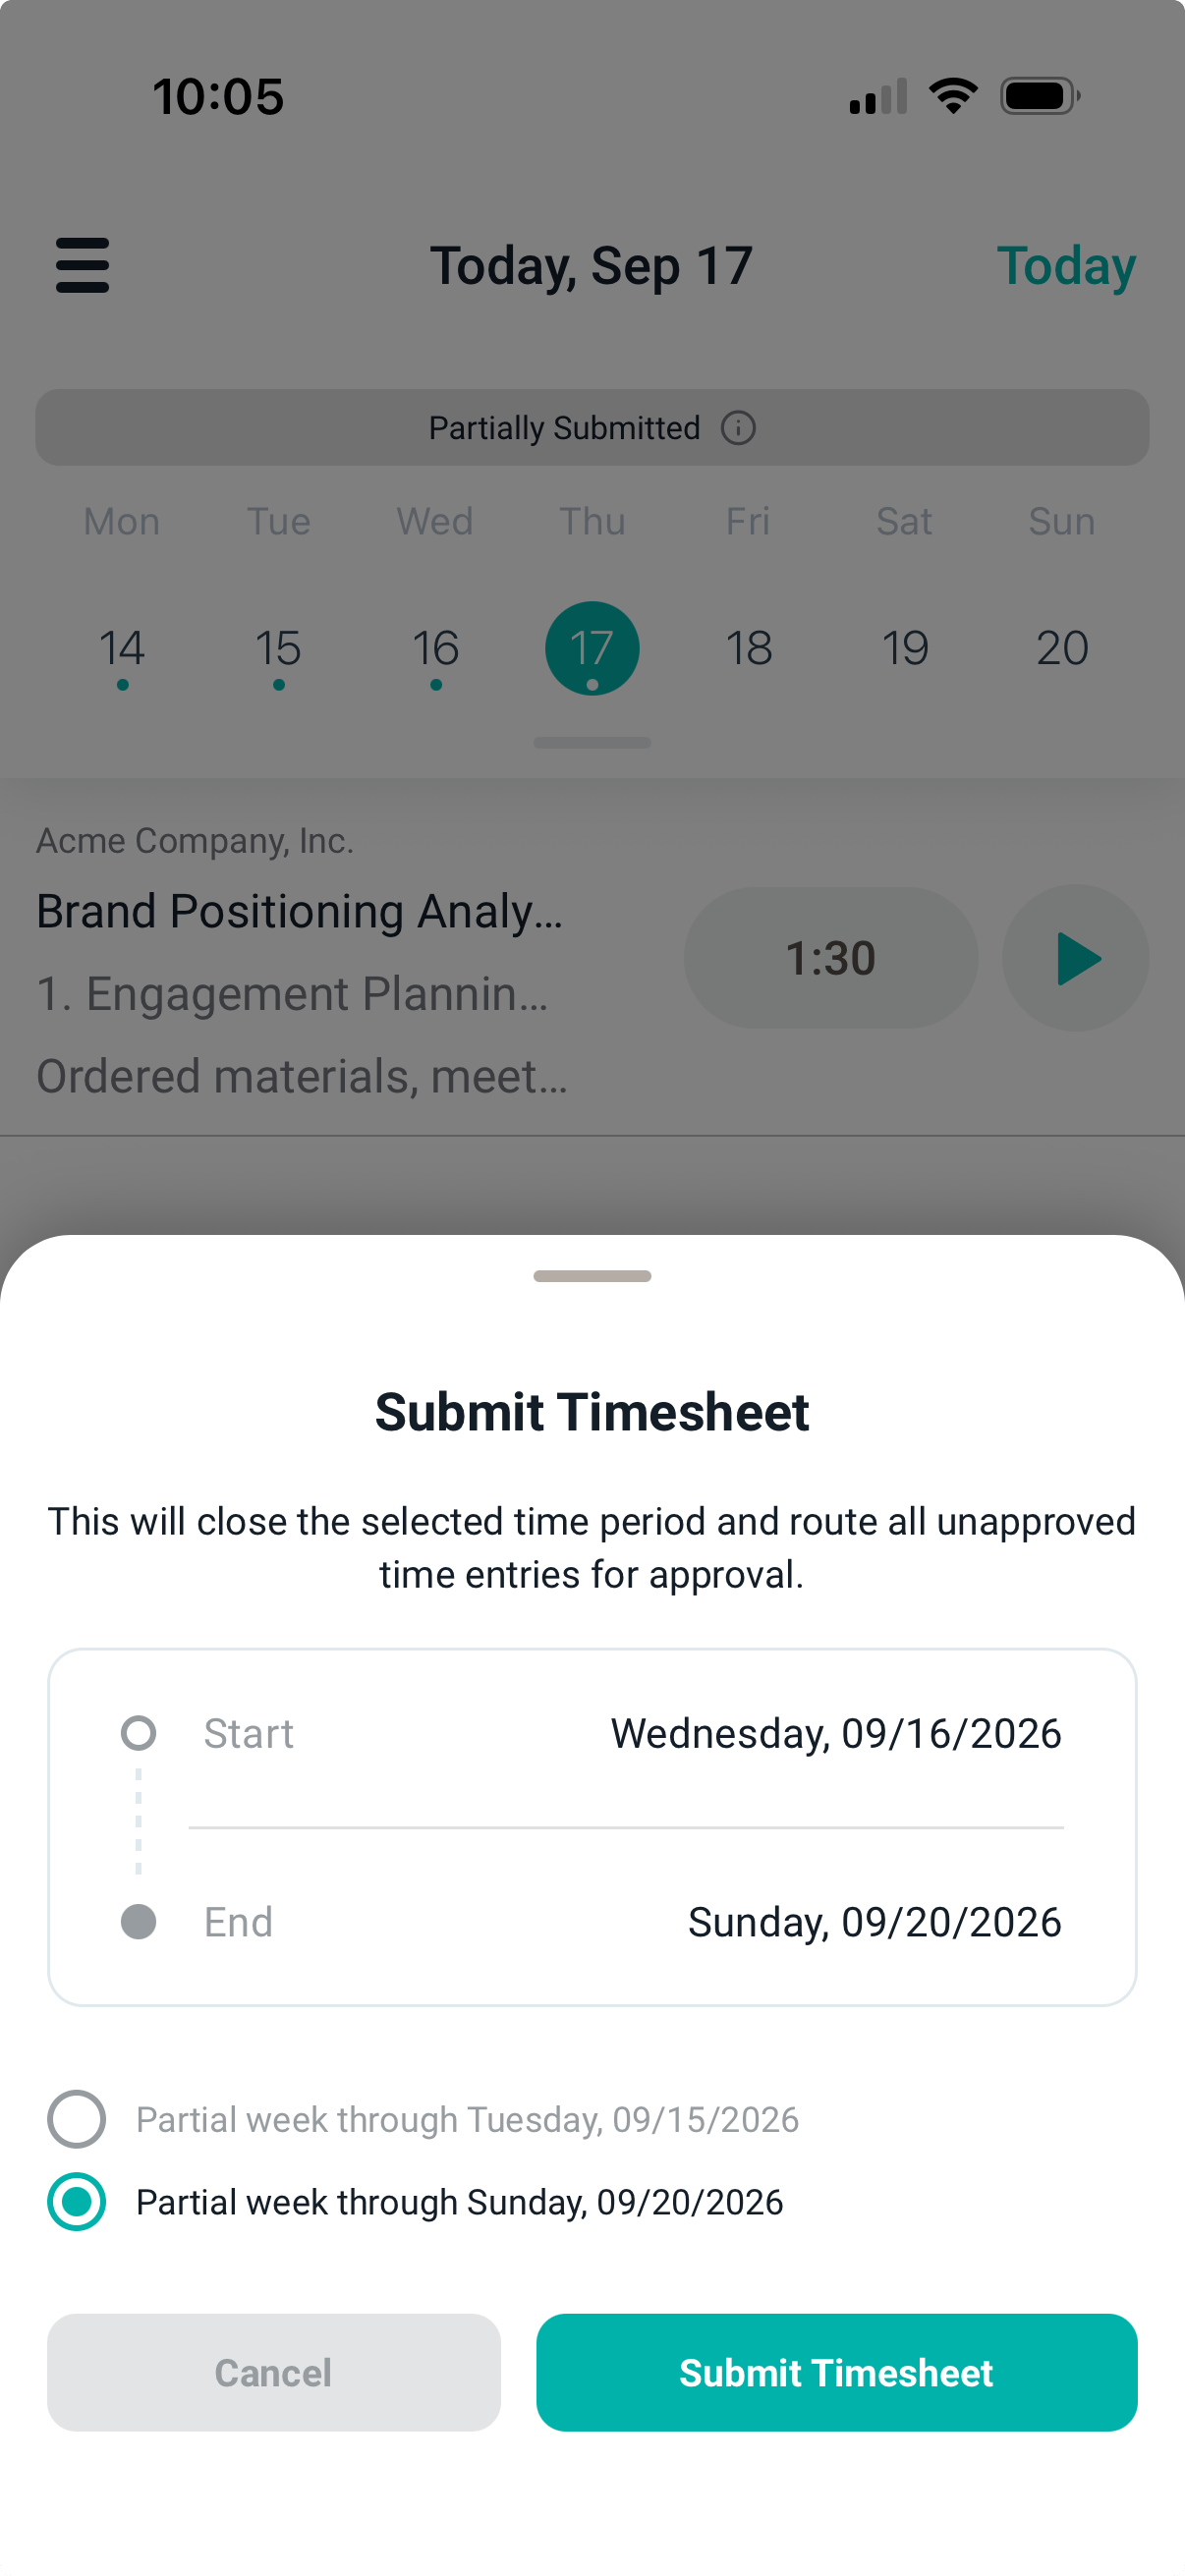
Figure 10 - Choosing a period when the week spans two timesheet periods
- If a timer is running, Ruddr stops it as part of the submission.
- Time entries on projects that require manual approval move to Pending Approval; entries on projects that are approved automatically move to Approved.
- The time entries covered by the timesheet are locked. The New Time Entry button and the timer buttons on existing entries are disabled for those days until the timesheet is unsubmitted.
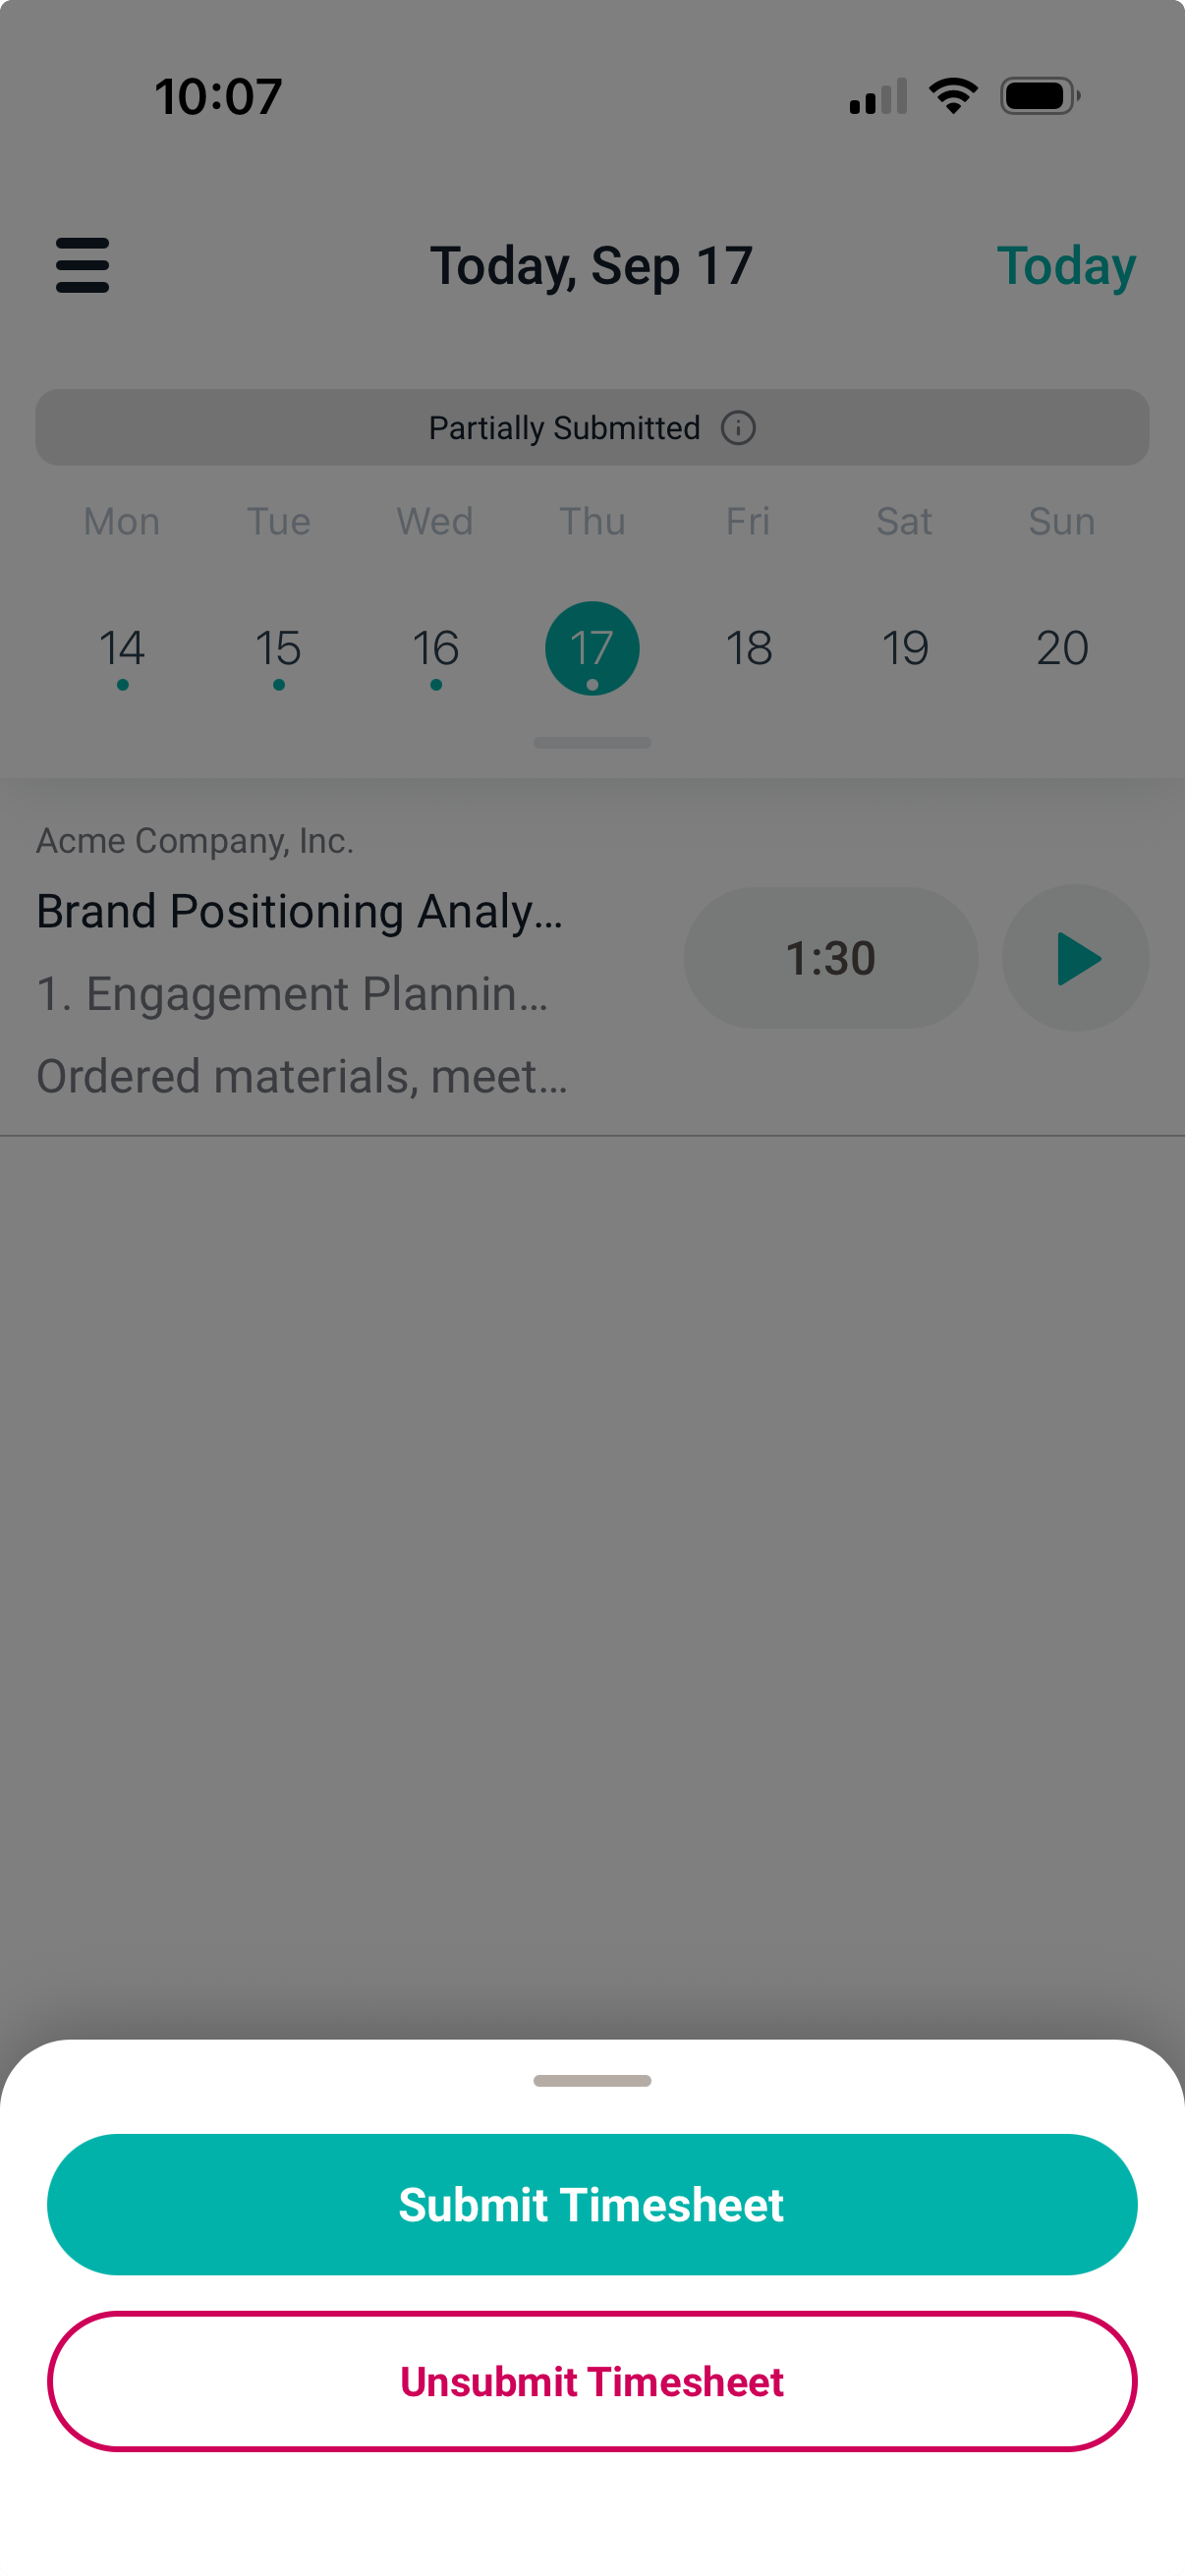
Figure 11 - Unsubmitting a timesheet
When timesheets are disabled
If the Timesheets feature is turned off in your workspace, no status bar appears above the calendar. Instead, the bottom of the time entry screen shows a Submit for Approval button with a badge indicating how many unsubmitted time entries exist for the selected day. Tapping it submits the entries for that day and confirms with the message “Time entries have been submitted for approval”.Signing an attestation
If you are required to certify the accuracy of your time, the submission sheet includes an Attestation section showing your attestation text, followed by a Signature field (Figure 12). The Submit Timesheet button stays disabled until you type your name or initials into the Signature field. At least three characters are required. For more on how this is configured, see the Timesheet Attestation article.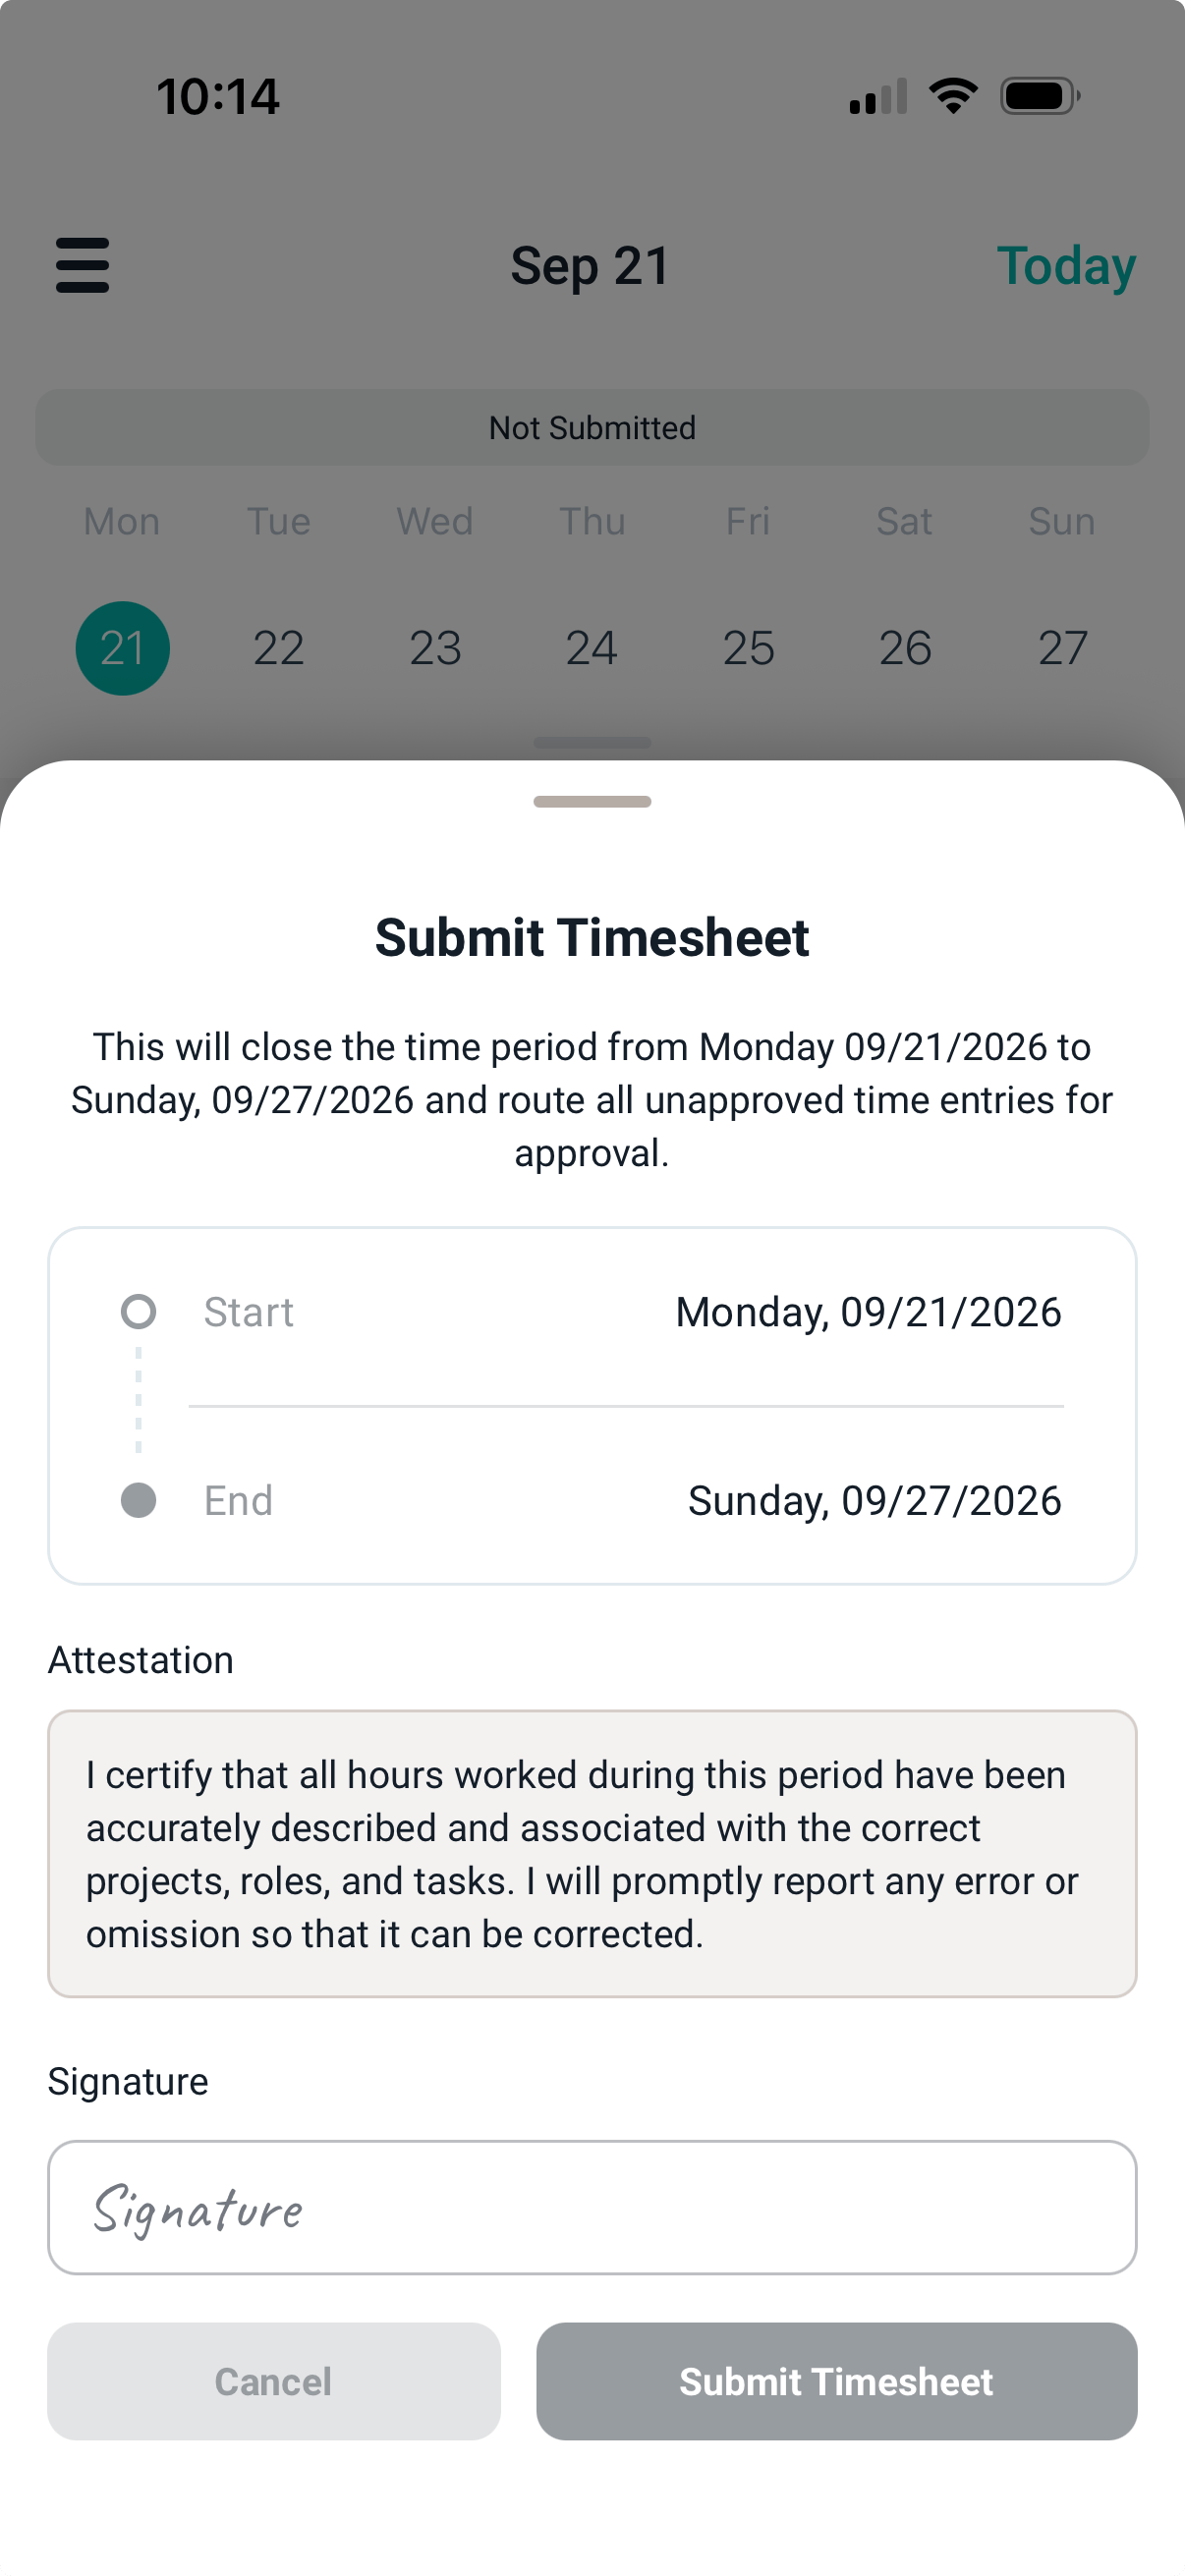
Figure 12 - Signing a timesheet attestation on submission
Expenses
You can create expenses in the Ruddr mobile app by switching to the expense section. By clicking the three lines in the top left of the app, you will be given the option to move between time and expenses. Once in the expense you have the option to add to a current expense report or create a new one by clicking New Expense Report on the bottom of the app. (Figure 13)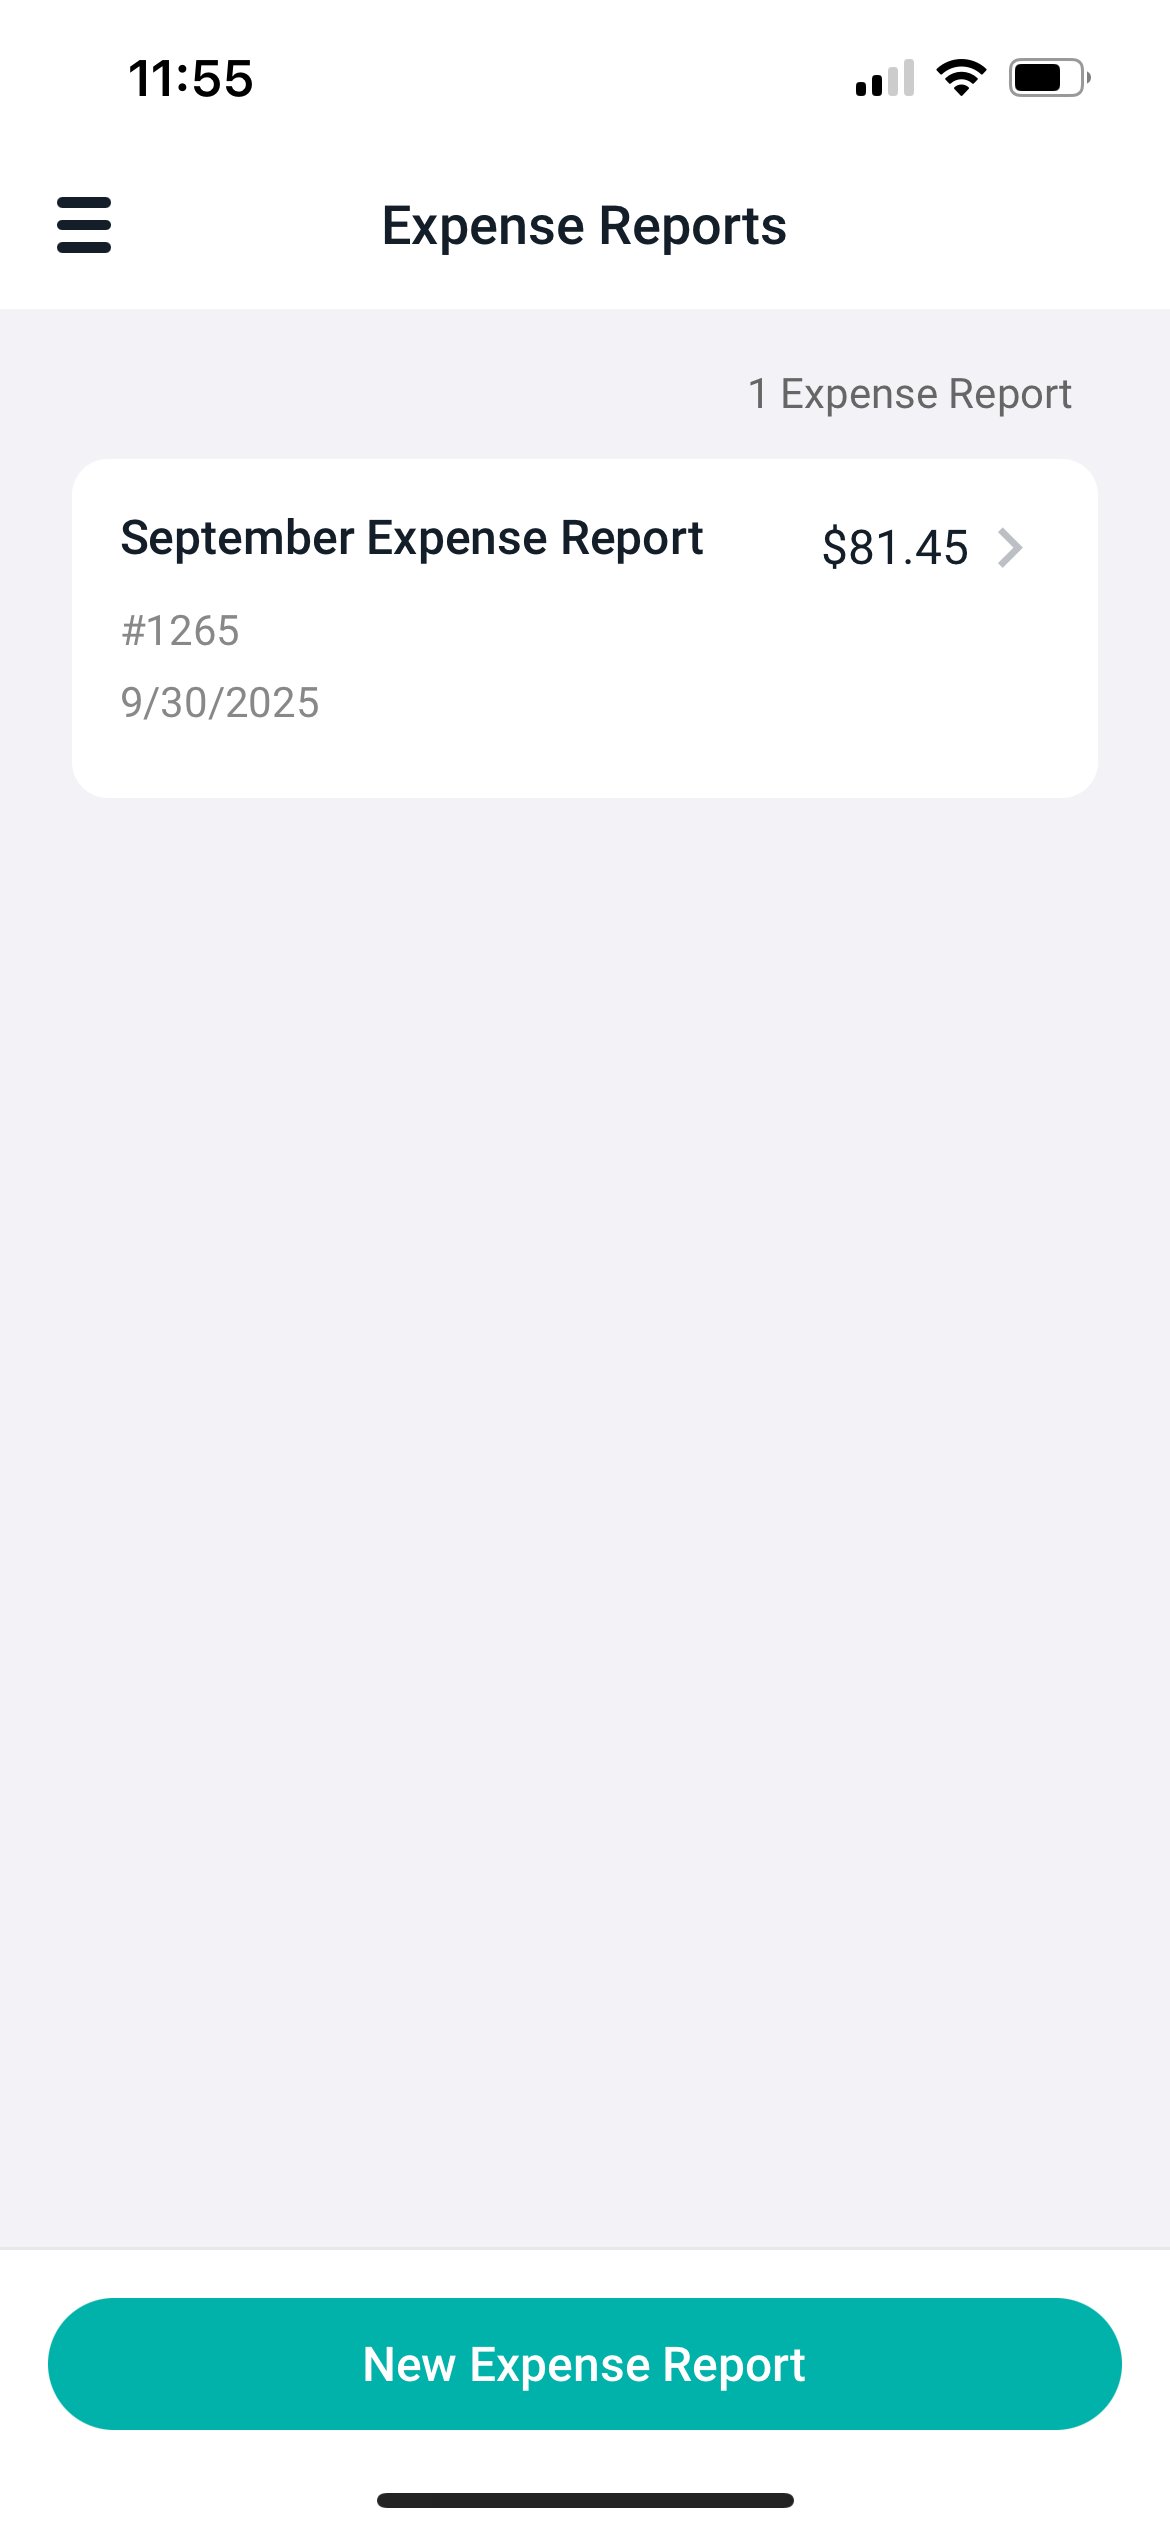
Figure 13 - Add to a current expense report or create a new report
Add or edit an expense
Once in your expense report, you can either add a new expense or edit an existing expense. To edit an existing expense, (Figure 14) simply click on the expense and you can add further details, receipts or view the history of the expense. To add a new expense, select the New Expense Item in the bottom left of the expense report screen.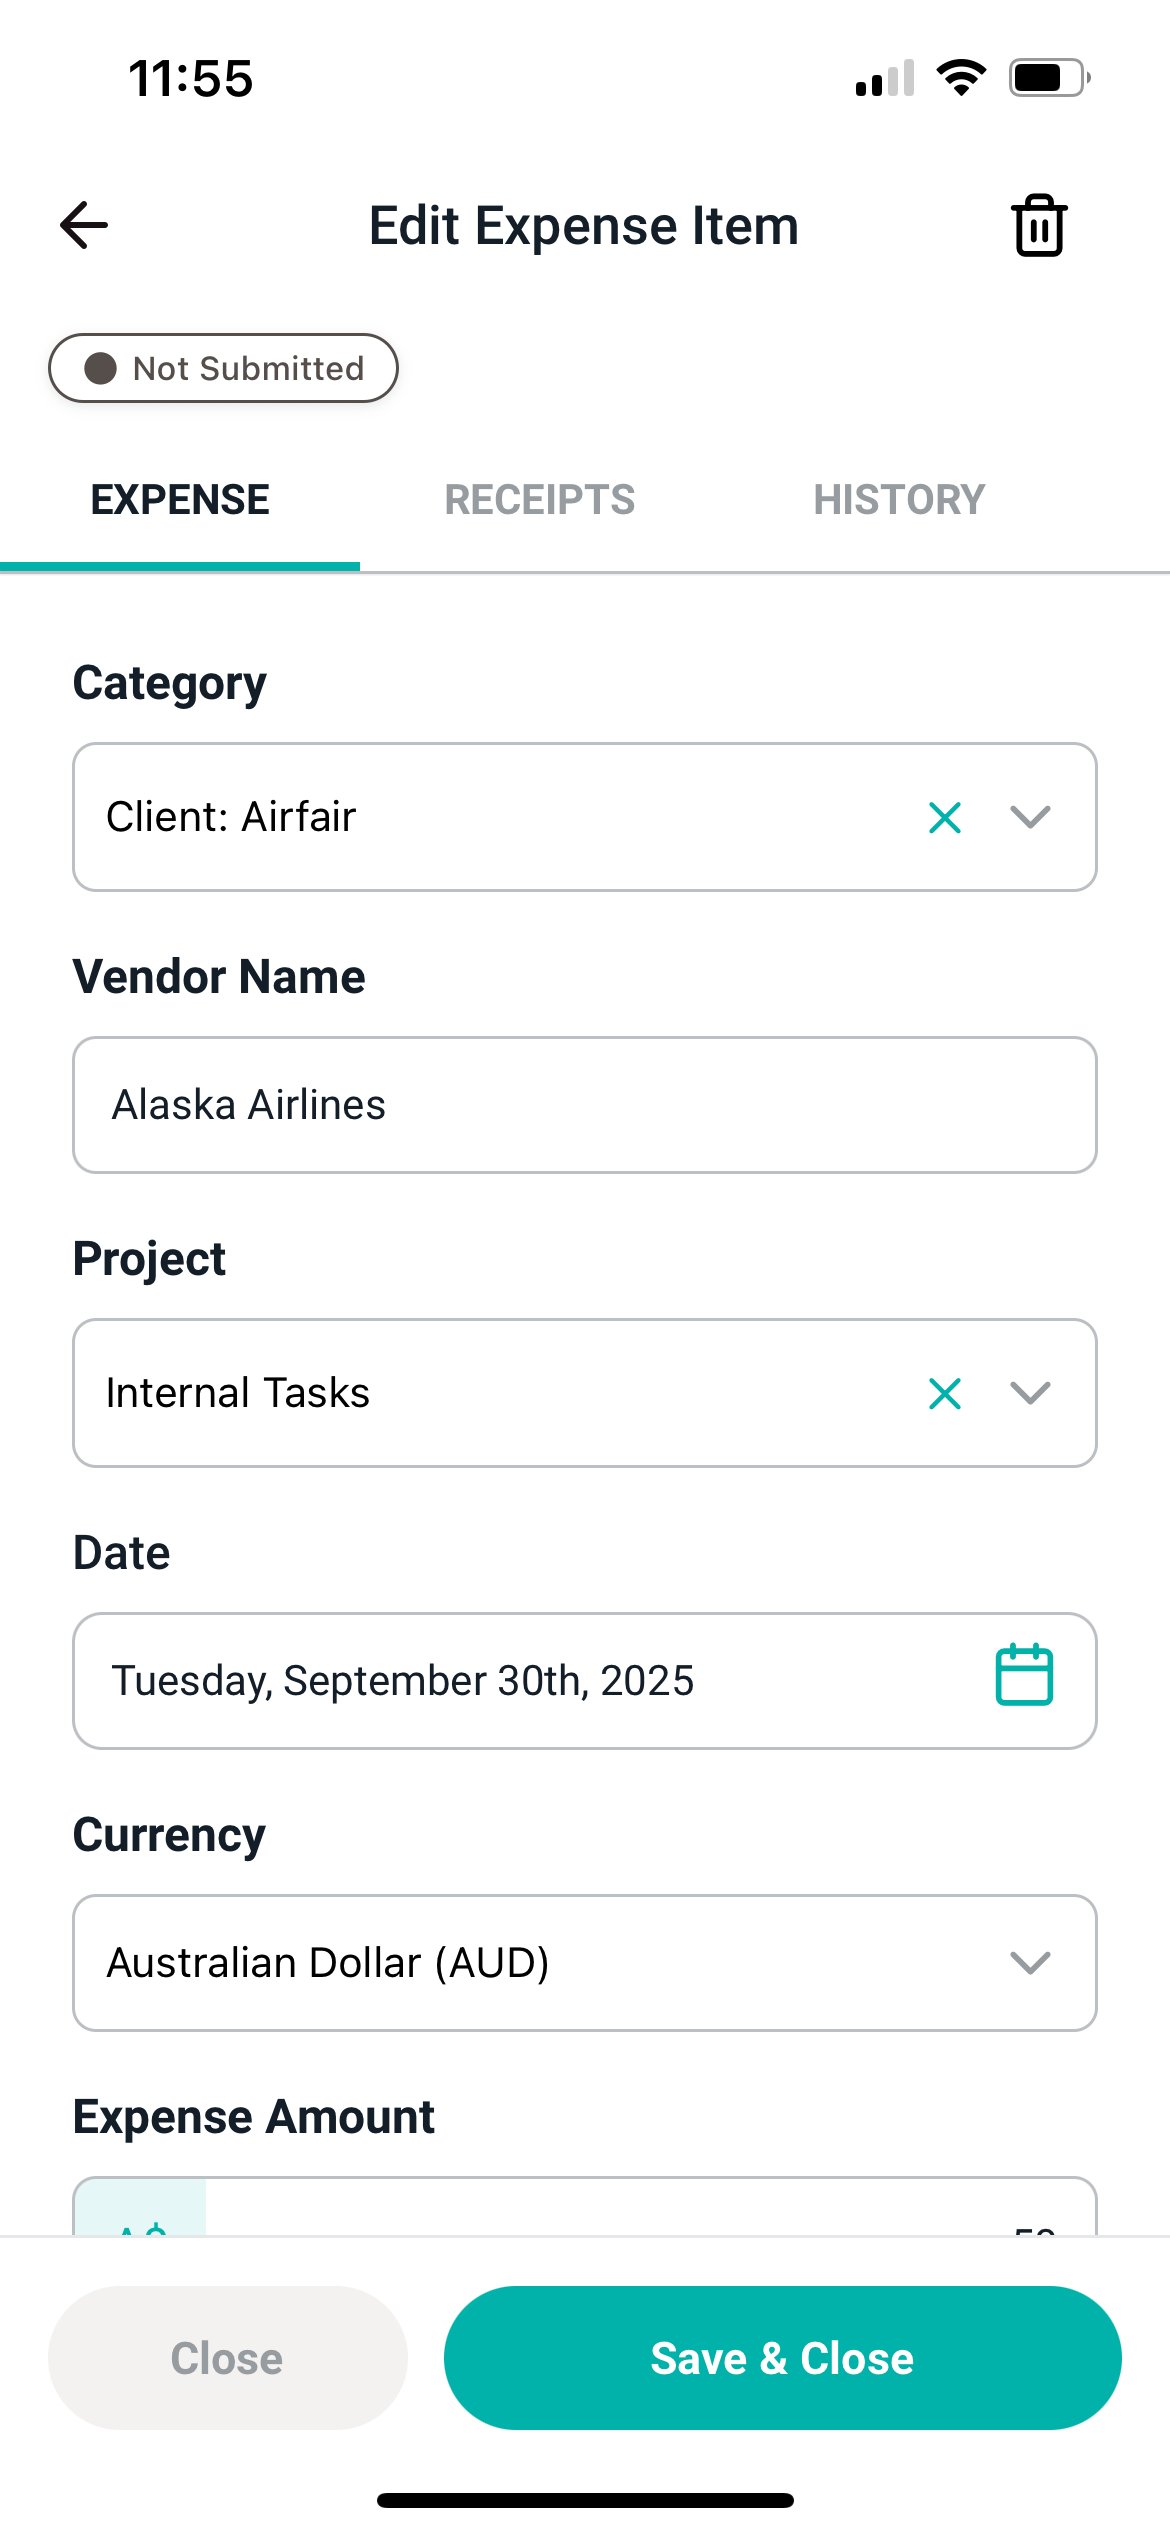
Figure 14 - Edit an existing expense
Figure 15 - Create a new expense
Submitting your expense report
Once you have added all needed expenses, you can submit your expense report for approval utilizing the Submit for Approval button in the bottom right. (Figure 16) If you need to add additional expenses to this report, you can add them with the New Expense Items button.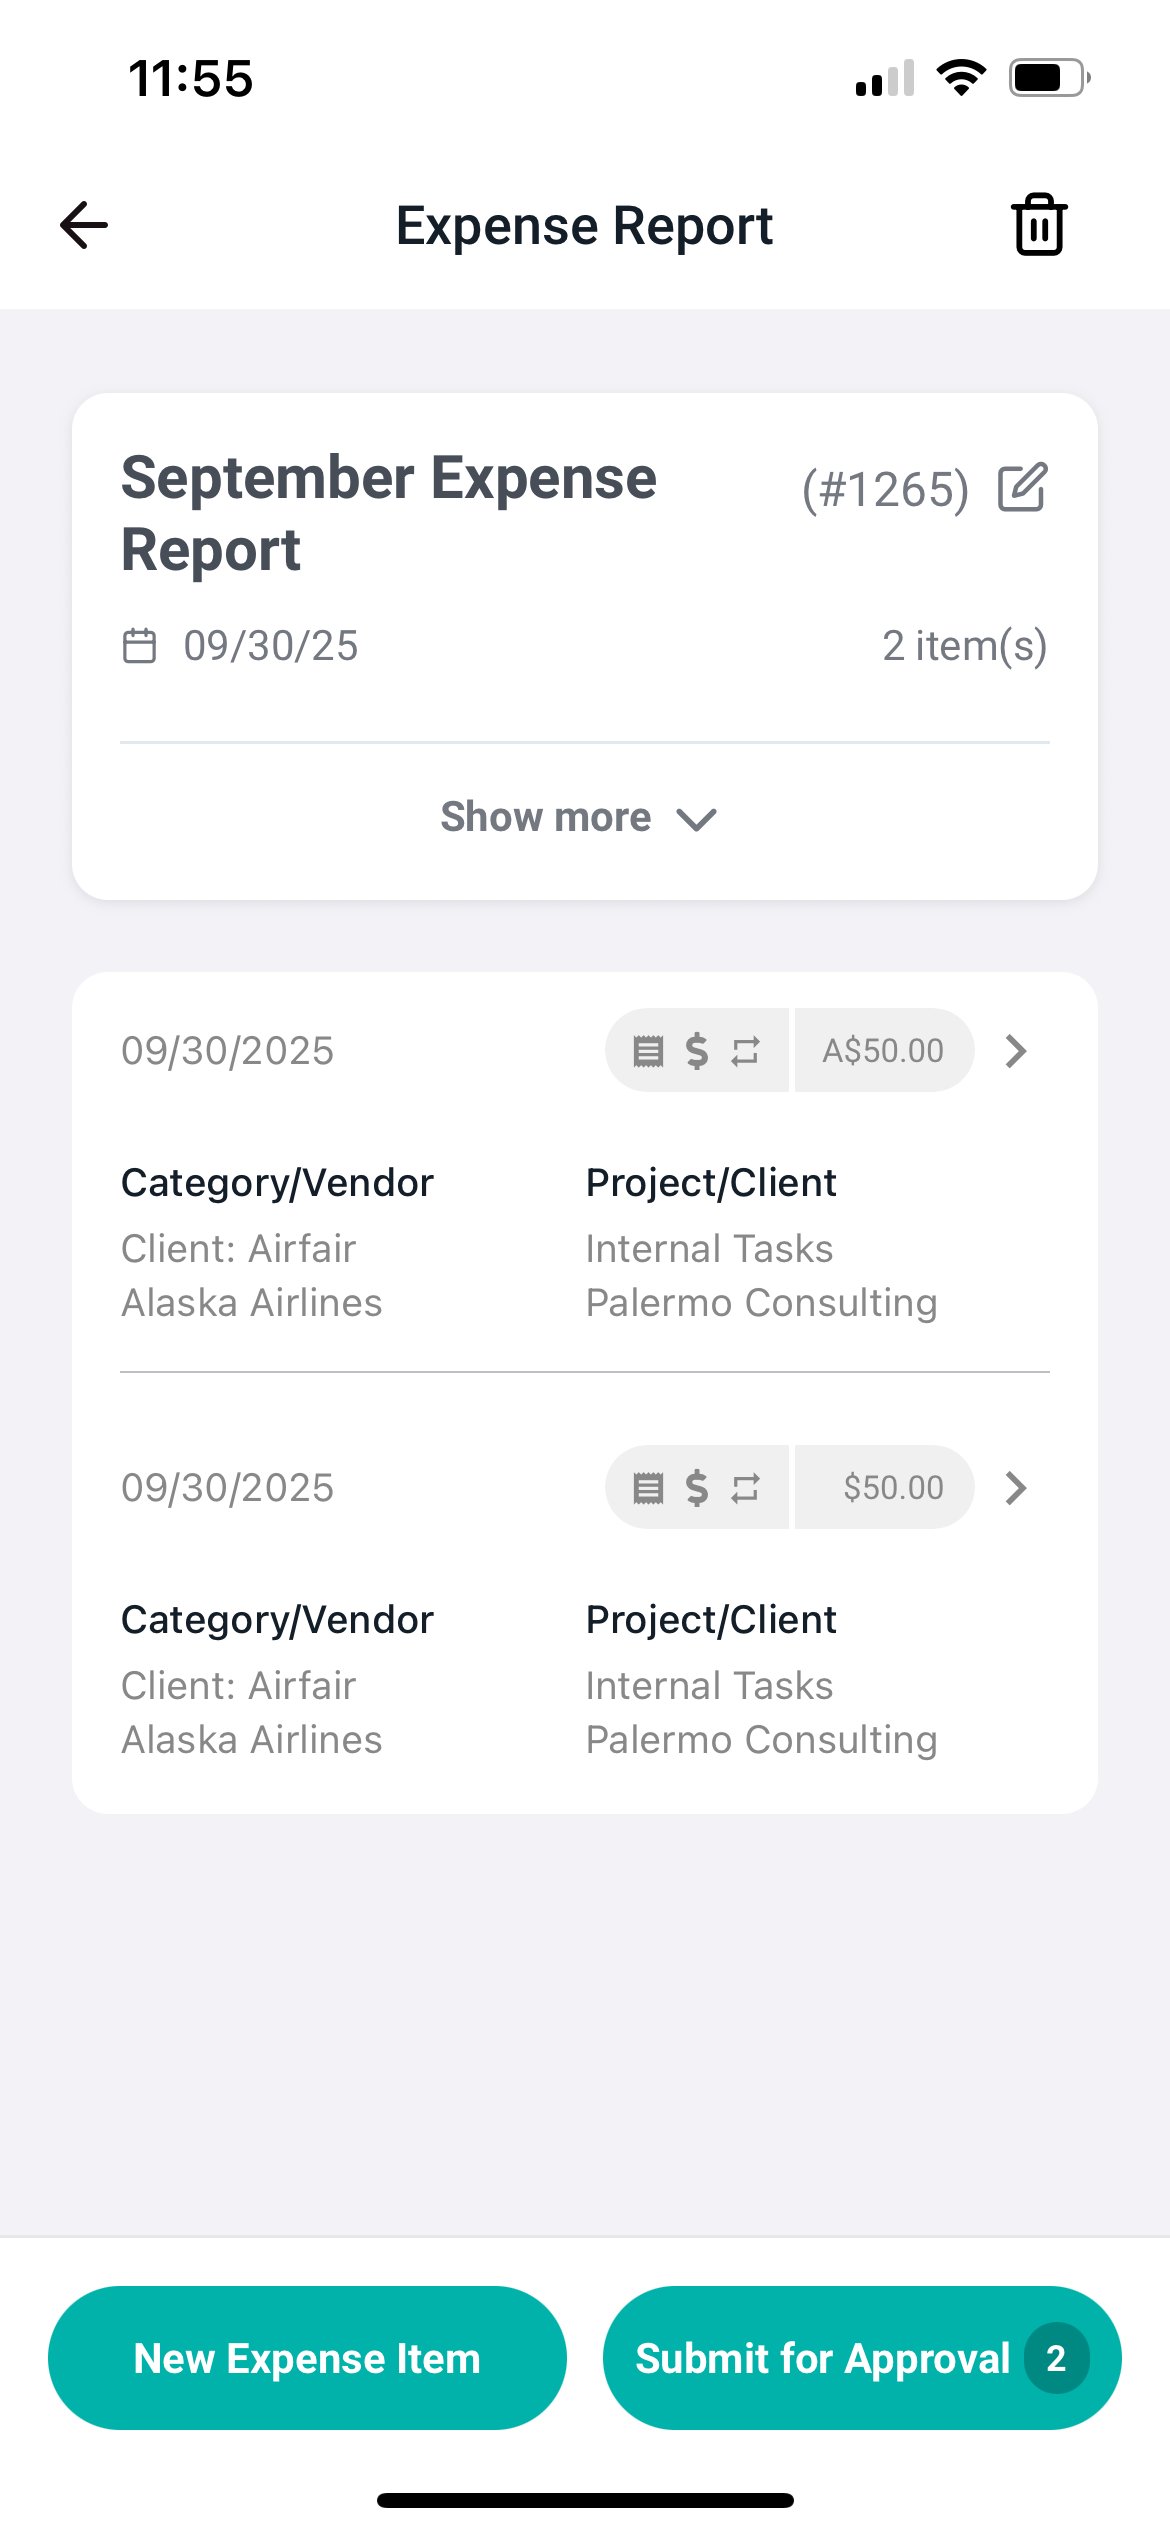
Figure 16 - Add more expenses or submit expenses for approval