

Download the MacOS Desktop App
In the Apple App Store, search for the Ruddr Desktop app. (Figure 1)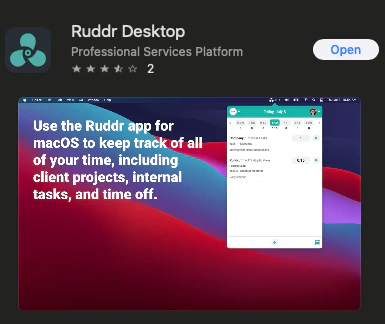
Figure 1 - Desktop App you want to download from the Apple App Store

Figure 2 - Once you download the Desktop app, you can access from your navigation bar
Time Entries
When you open the desktop app, you will see any existing time entries for the current day. (Figure 3) Here you can edit the time entries or start the timer for existing time entries by pressing the play button on any individual entry. You can also switch to view / edit time for other days.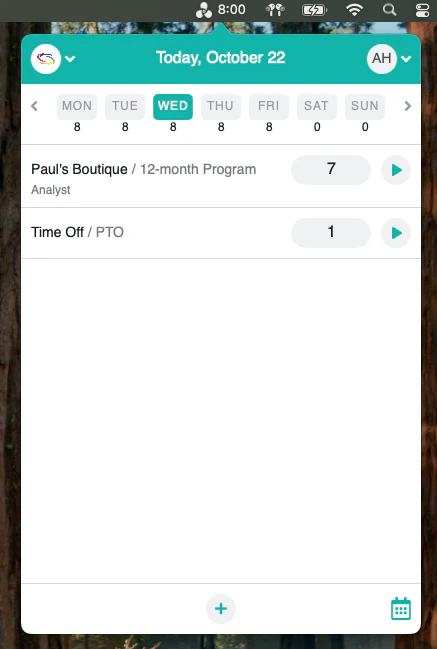
Figure 3 - Update time entries or begin a timer
Adding a new time entry
If you need to add a new item, you can do so by clicking the + button on the bottom of the screen. You will be able to enter a new time entry for either project time or time off. (Figure 4) The new time entry will default to project time and you can start a timer. If you are just looking to record the hours worked, you can add those hours to the time field and will have the option to save.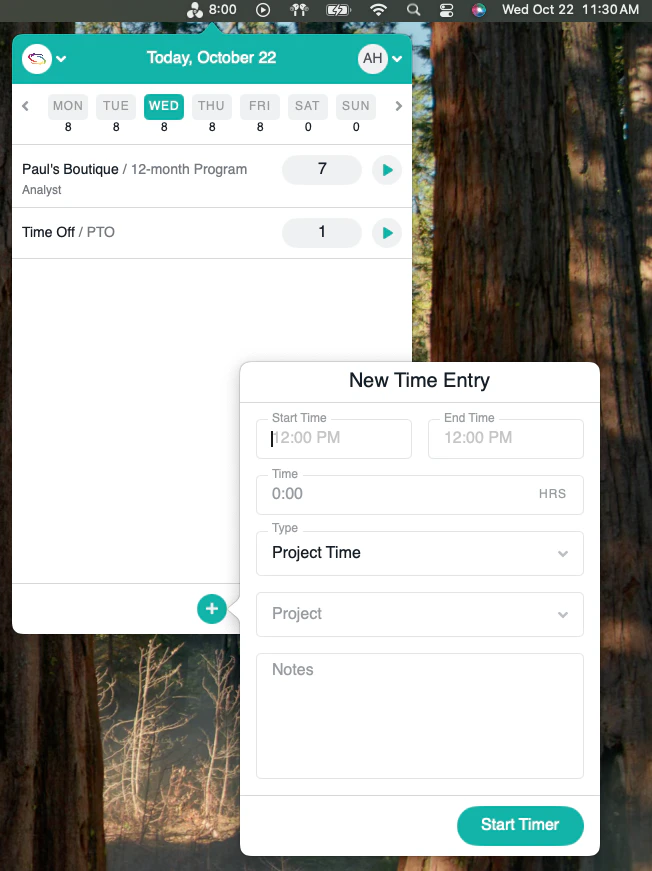
Figure 4 - How to add a new time entry
Editing a time entry
If you need to make edits to the projects listed, clicking on the project line will open details for you to edit. (Figure 5) Here you can input hours worked or the start / end time if needed.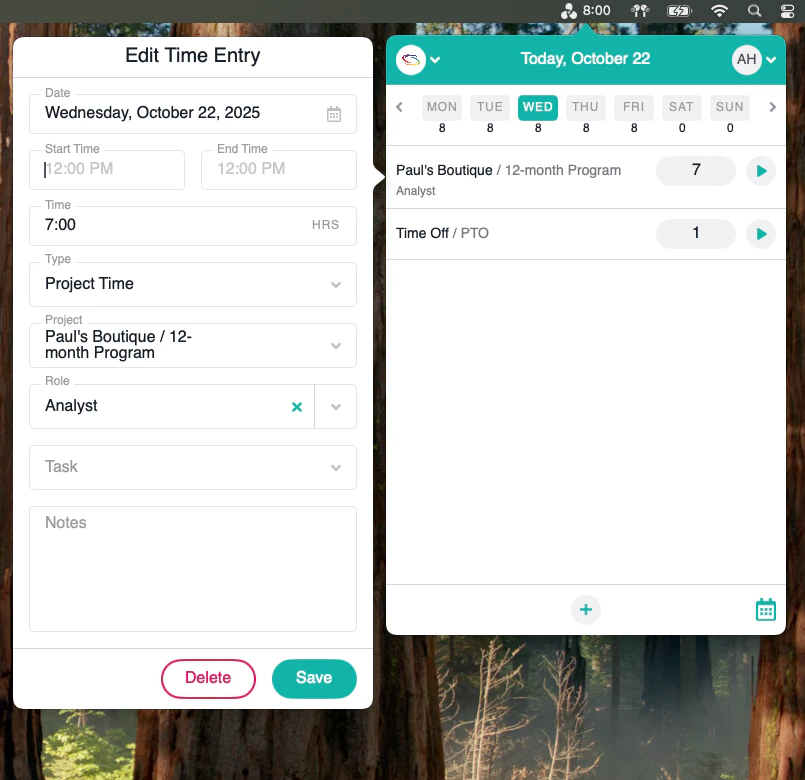
Figure 5 - Editing a time entry
Submitting Your Timesheet
You can submit your timesheet directly from the desktop app. Timesheets behave the same way across the web, mobile, and desktop apps. The Timesheets Overview article covers the underlying concepts: how time entries are grouped, what submission does, and when a timesheet can be unsubmitted. Dates, day names, and period labels in the desktop app follow the language and region settings on your Mac.The timesheet status bar
When the Timesheets feature is enabled in your workspace, a status bar appears above your time entries (Figure 6) describing the week you are viewing:- Not Submitted - no timesheet covers any day of the week.
- Partially Submitted - a timesheet covers some, but not all, of the days in the week. Click the information icon next to the status to open a list of the days that are still open.
- Submitted - a timesheet covers all seven days of the week.
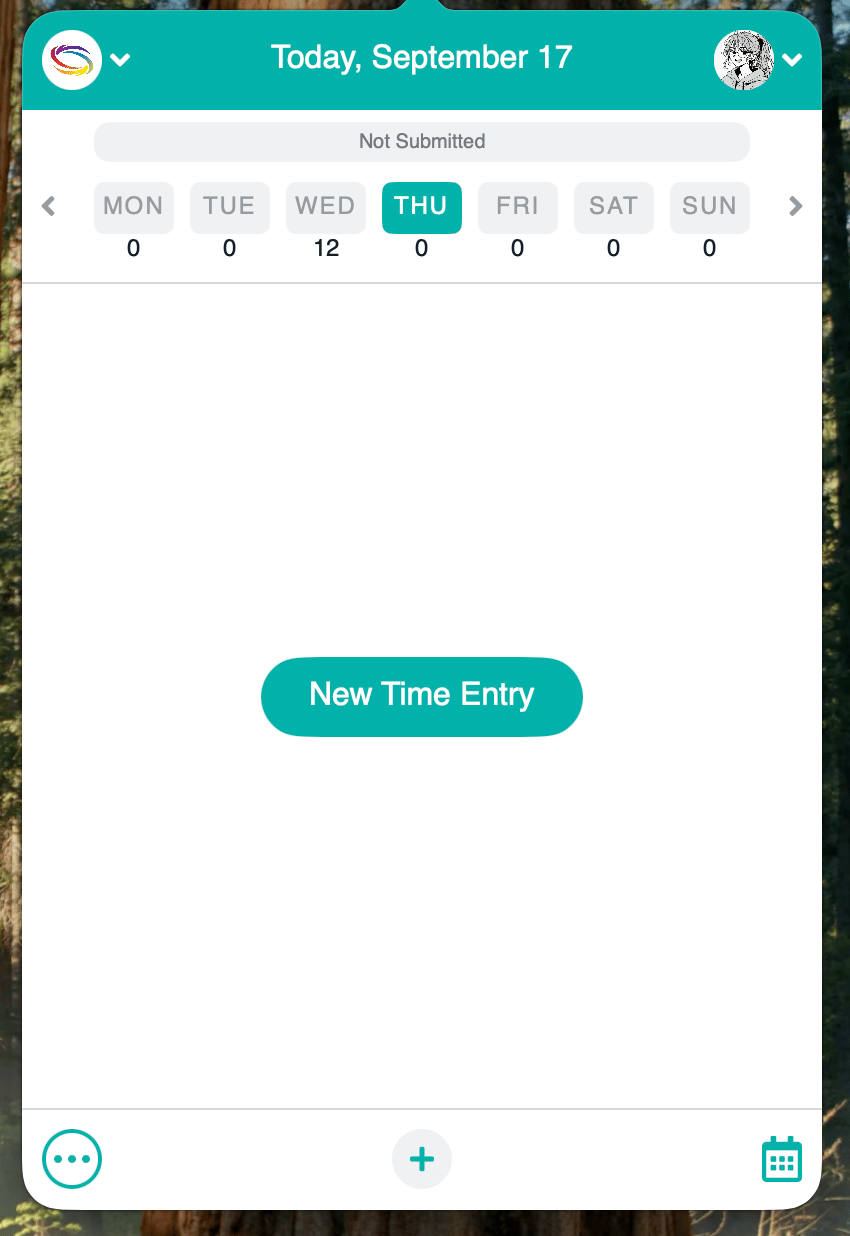
Figure 6 - The timesheet status bar above your time entries
Submitting a timesheet
Click the More button and choose Submit Timesheet (Figure 7). The More button appears only when there is an action available for the week you are viewing, so you will not see it on a week with nothing to submit, unsubmit, or resubmit.
Figure 7 - The More button, showing the Submit Timesheet action
Signing an attestation
If you are required to certify the accuracy of your time, the Submit Timesheet window includes an Attestation box showing your organization’s attestation statement, followed by a Signature field (Figure 8). The statement itself is read-only. Type your name or initials into the Signature field to enable Submit. At least three characters are required, and spaces on their own do not count. Your signature is displayed in a script font. For more on how this is configured, see the Timesheet Attestation article.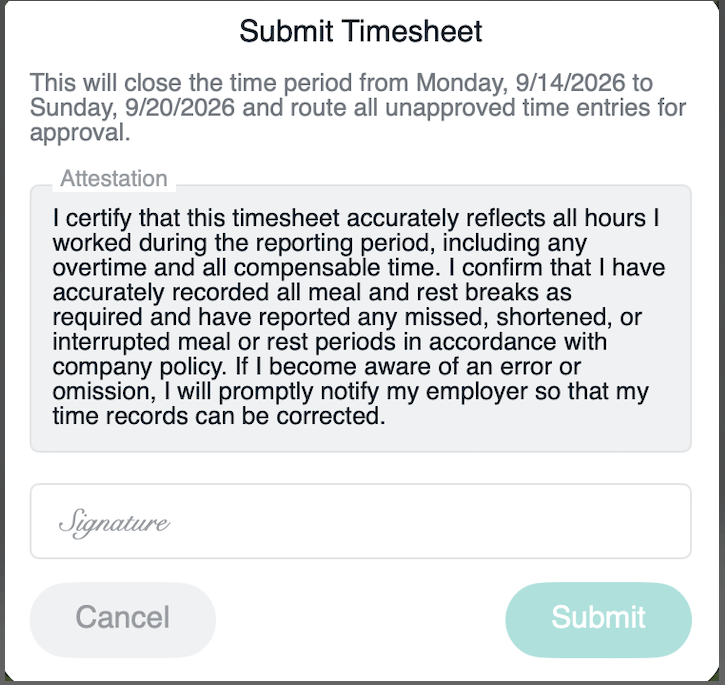
Figure 8 - The Submit Timesheet window with an attestation statement and signature
After a timesheet is submitted
The days covered by a submitted timesheet no longer accept new time entries, and the timers on those days are disabled. In a partially submitted week, you can still start timers on the days that have not been submitted yet. Each time entry shows its approval status by color, so you can tell at a glance which entries are pending approval, approved, or rejected. See Time Entry Status for what each status means.Unsubmitting and resubmitting
The More button offers two further actions when they apply to the week you are viewing (Figure 9):- Unsubmit Timesheet reopens a submitted timesheet so you can edit it again. This is available only when your security role and your workspace’s timesheet unsubmission rules allow you to unsubmit that timesheet.
- Resubmit Rejected sends rejected time entries back for approval. You are not asked to sign the attestation again. In a partially submitted week, you can resubmit rejected entries only on the days that have already been submitted.
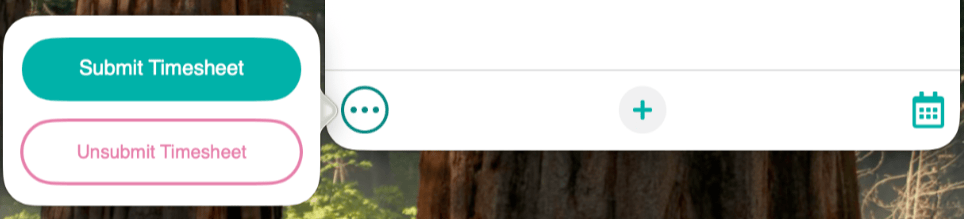
Figure 9 - The More button on a week where Unsubmit Timesheet is available
Desktop App Settings
Under your profile in the Desktop App, you have quick access to the Web App version of Ruddr and the Help Center, which is full of helpful articles on how to use Ruddr. (Figure 10) If you are logged into the desktop app and are not seeing a particular project or task, use the Refresh action menu to update the cached list of projects / tasks available in the app.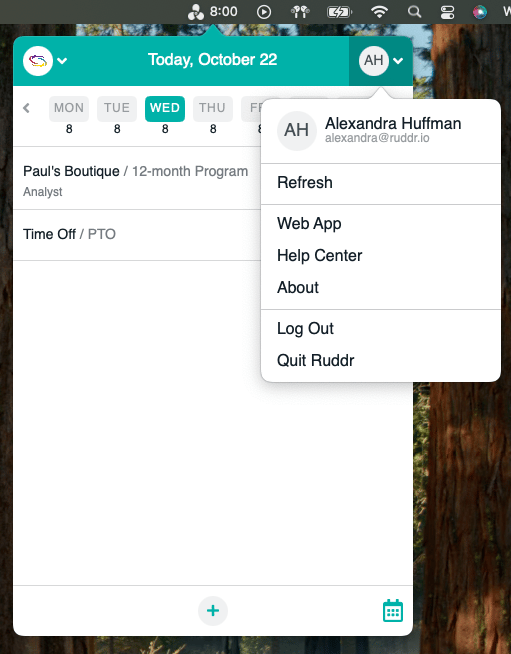
Figure 10 - Accessing the Web App and Ruddr Help Center