

- Add roles from the client
- Create roles for the project
Add Roles from the Client or the Workspace
Ruddr provides workspace admins with the ability to define workspace-level Project Roles and Rates within the Custom Data section of Workspace Settings. Once these roles are established, they are available to be used on clients and project throughout the workspace. In addition to inheriting project roles from the workspace, new roles can be added to clients to establish a client “rate card”. For more on these roles, please refer to the Client Roles article in the Ruddr Help Center. If roles have indeed been established for the client, those roles can be added to projects. In the Roles section (Figure 1), click the + button at the top-right of the roles list. The menu offers Add Client Roles, which will present a list of available client project roles (Figure 2). You can search the list to find the roles you need. Selecting one or more of these roles will add the role and the corresponding rate to the project (Figure 3). The Add All Client Roles option adds every client role in one step. In addition to adding client roles, you can also choose to add roles directly from the list of workspace roles. If you select the Add Workspace Roles option from the same menu, you can select which workspace roles to add to the project.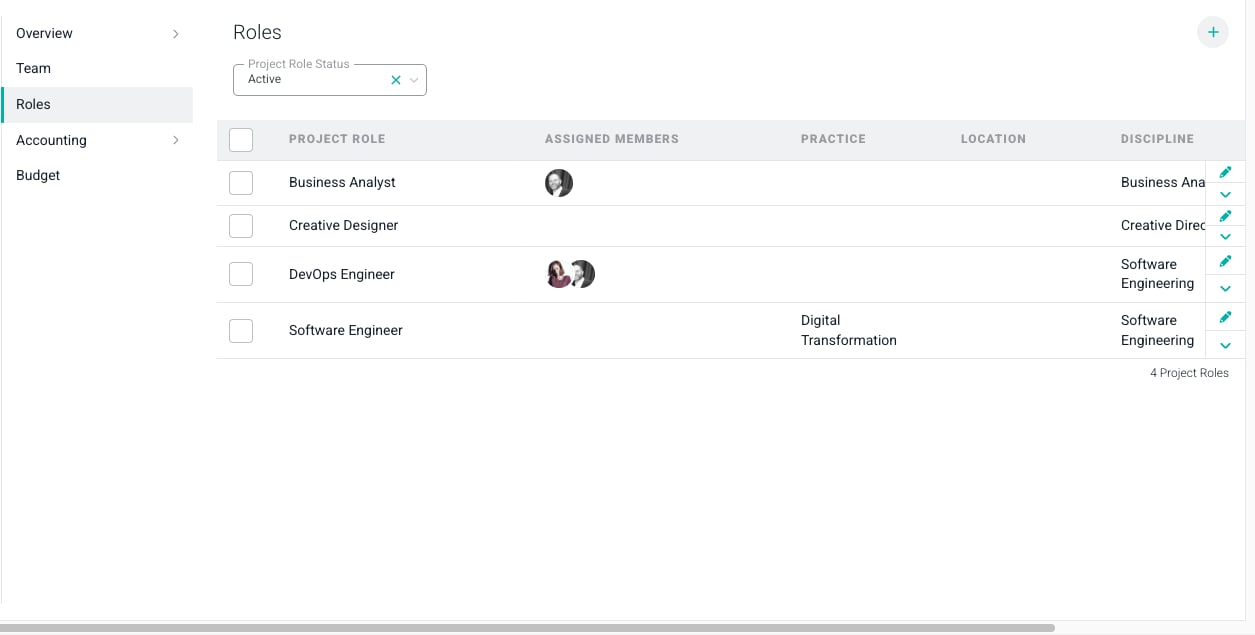
Figure 1 - The Roles Section of the Settings Tab Allows Project Admins to Add Roles from the Client
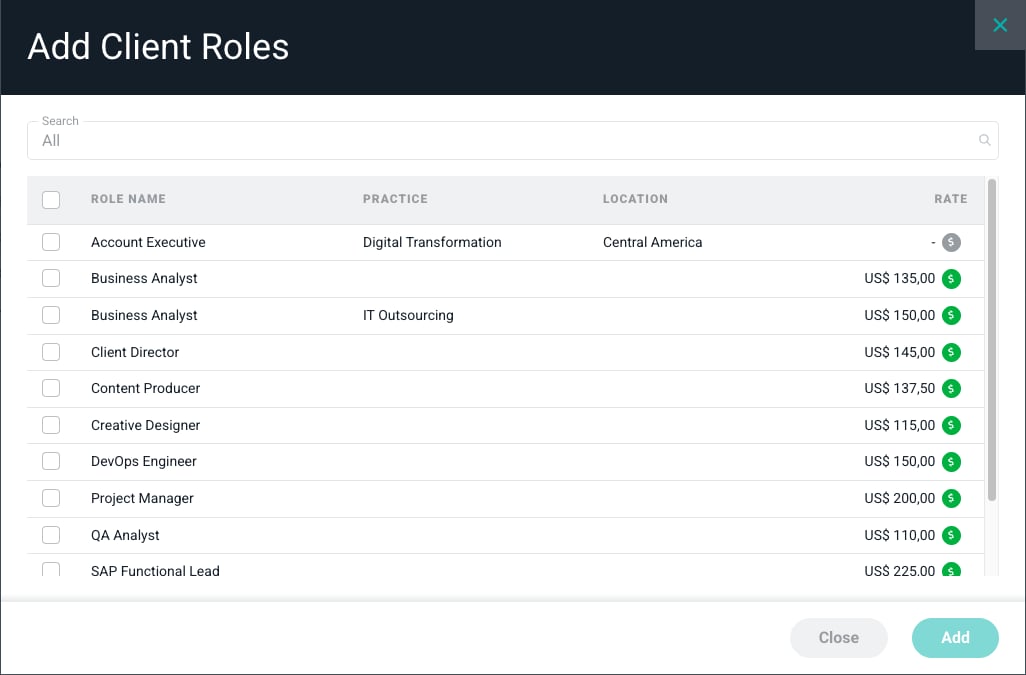
Figure 2 - Select from a List of Client Roles to Add to the Project
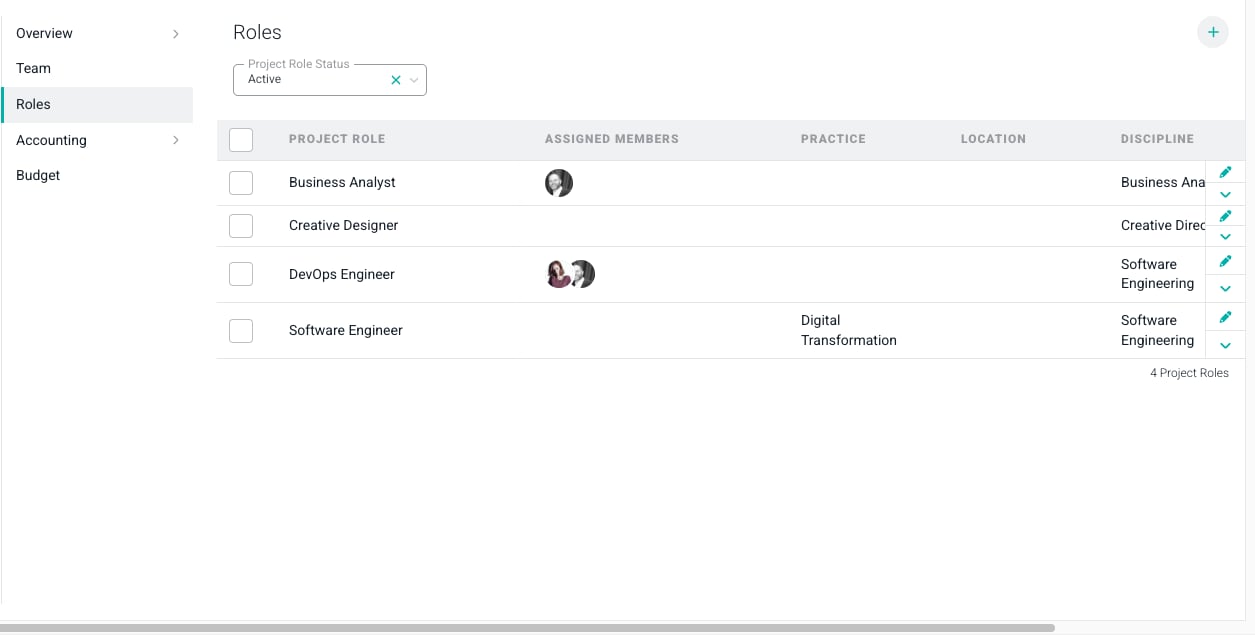
Figure 3 - Roles Added from Client
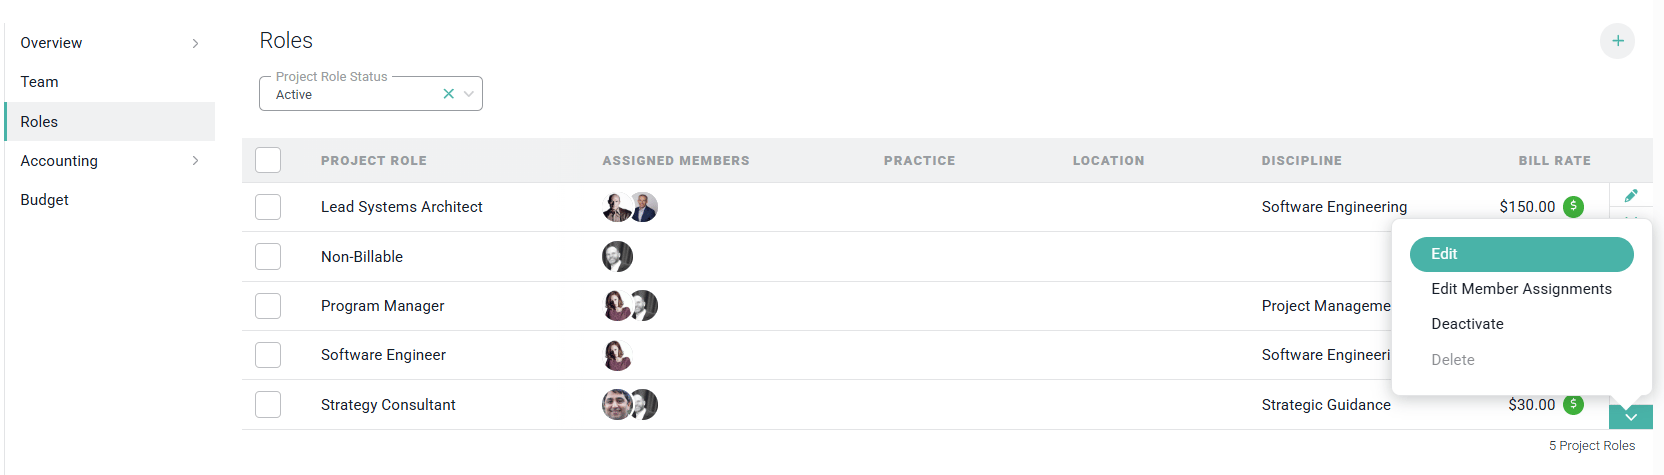
Figure 4 - Selecting Edit from the Action Menu will Allow you to Change Values on the Role
Create New Project Roles
To create a new project role, click the + button at the top-right of the roles list (Figure 1) and select Add Project Role. This will allow you to type in the name of the new role (Figure 5); optionally select a role location, practice, and / or discipline; set the role as either billable or non-billable; set the currency for the role’s bill rate; provide an hourly rate (for billable roles); and assign project team members to the new role using the Member Assignments section of the same form — the same way you would when editing an existing role’s member assignments. Practices, locations, and disciplines are set by your Workspace Admin and they are used to group associated roles together for reporting purposes.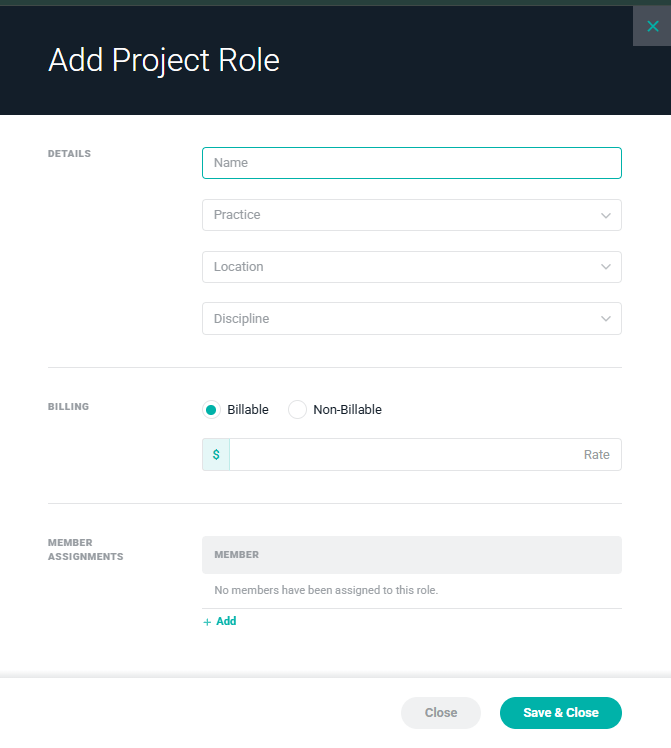
Figure 5 - Add a Role to the Project
Assign Project Team Members to Roles
Once you have your project roles defined, you can then assign project team members to those roles. There are two ways to manage role assignments, both starting from the role’s row in the Roles section (Figure 1):- Edit the role. Select the Edit action item from the role’s action menu to open the role form. The Member Assignments section lists everyone currently assigned to the role, with a remove action next to each member. Click Add below the list to search for and add one member at a time (Figure 6).
- Edit member assignments in bulk. Select the Edit Member Assignments action item from the role’s action menu to open a checklist of every project team member. Check or uncheck members to assign or unassign them from the role, then click Save & Close (Figure 7). This is the fastest way to assign or unassign several members at once.
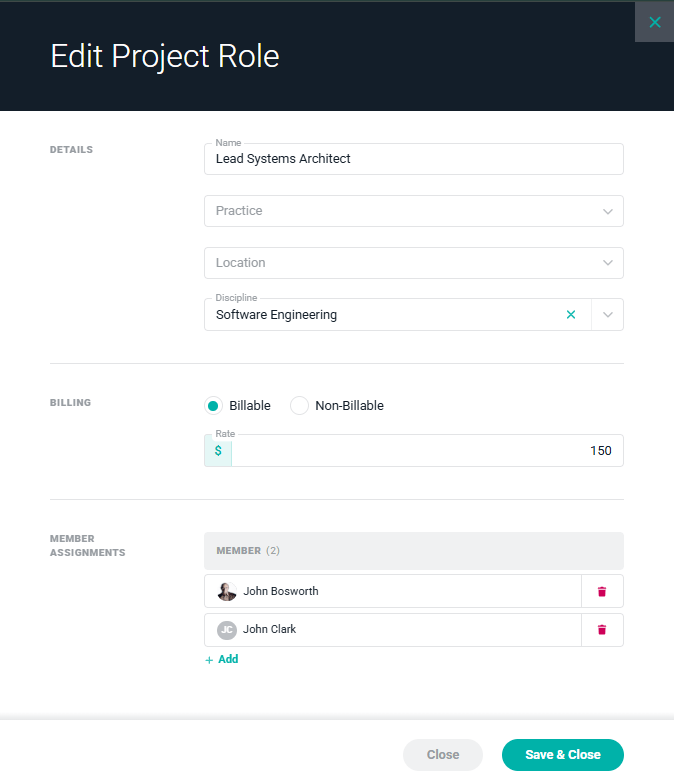
Figure 6 - Managing Member Assignments from the Role Form
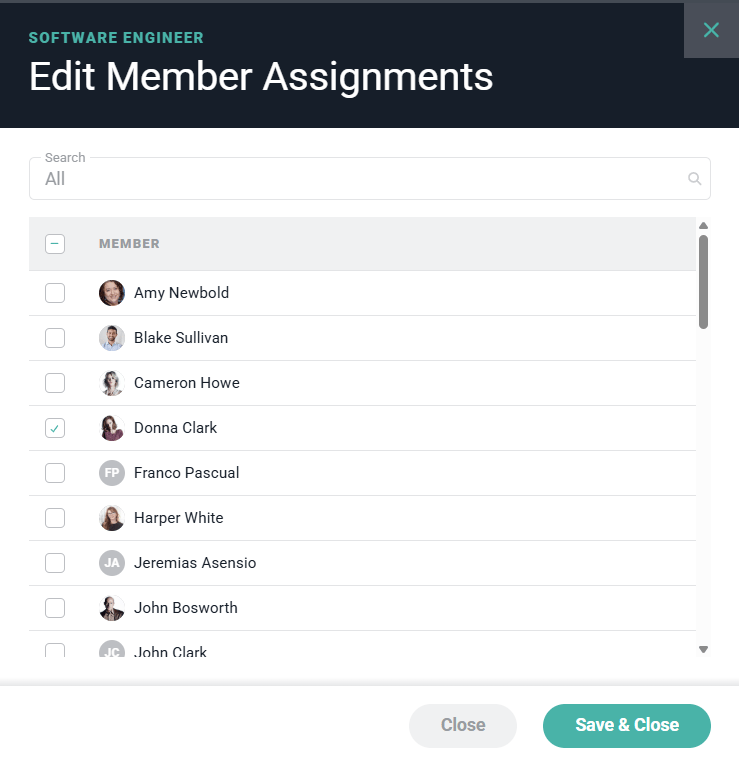
Figure 7 - Editing Member Assignments in Bulk
Delete a Role Assignment
You can delete a role assignment in any of the following ways:- Hover over the member’s avatar in the role’s avatar stack (Figure 1) and click the remove button that appears. Ruddr will ask you to confirm before unassigning the member.
- Edit the role and click the remove action next to the member in the Member Assignments list (Figure 6).
- Uncheck the member from the Edit Member Assignments checklist (Figure 7).
Delete or Deactivate a Role
A project role can be deleted or disabled by using the menu on the right side of the row (Figure 1). There are times when the delete option will not be enabled but you always have the ability to deactivate a role (Figure 8).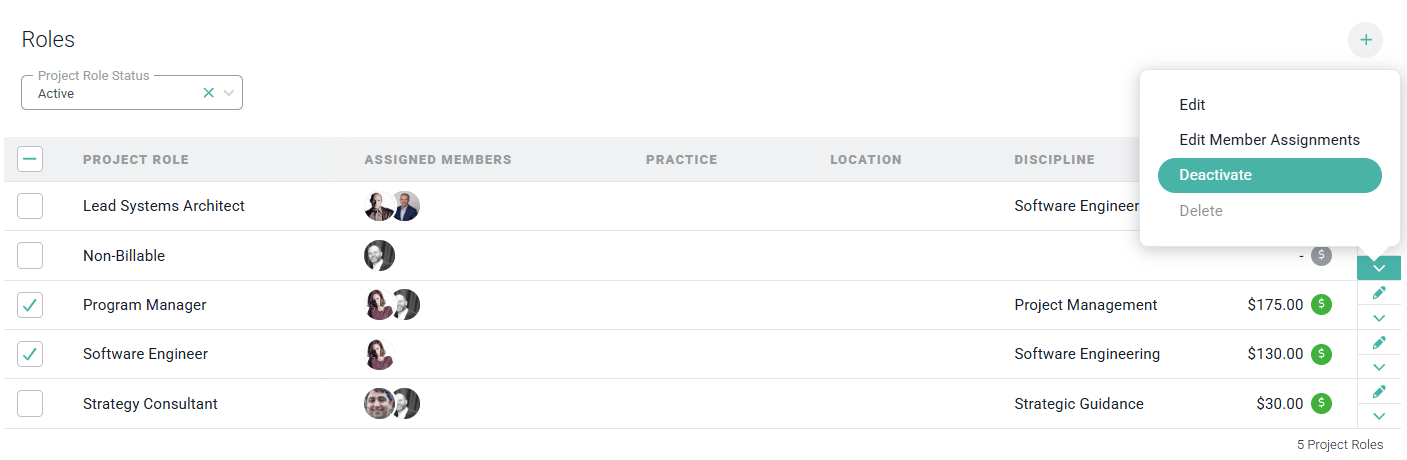
Figure 8 - Deactivate a Project Role
- One or more project team members are assigned to the role.
- There are existing time entries associated with the role.