> ## Documentation Index
> Fetch the complete documentation index at: https://help.ruddr.io/llms.txt
> Use this file to discover all available pages before exploring further.
# Earned Revenue Adjustment Ledger
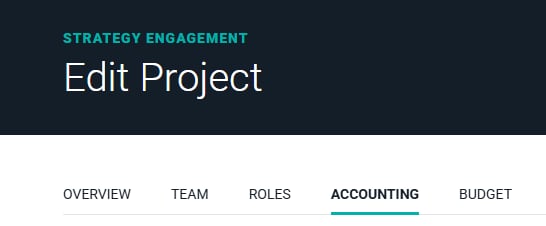
The **Accounting** tab (Figure 1) of the **Edit Project** drawer allows you to make adjustments to earned revenue. To edit a project you must have access to the project and must have the **Edit Project** permission for that project based on your Ruddr [security role](workspace-administration/security-roles).
 ### Creating Adjustments to Earned Revenue
The **Earned Revenue Adjustment Ledger** is at the bottom of the **Accounting** tab of the **Edit Project** drawer. This ledger allows you to adjust the earned revenue for all types of revenue, including services, expenses, products, and other items. Adjustments to earned revenue can be either positive or negative.
Adjustments to earned revenue are not invoiced to clients as they simply impact the calculation for the specified type of earned revenue. Accordingly, they do not change the invoiced revenue amount. Adjustments to earned revenue are reflected on Ruddr dashboards and reports.
There are two ways to add adjustments to the **Earned Revenue Adjustment Ledger** on the **Edit Project** drawer:
* [Add a Single Earned Revenue Adjustment](/projects/earned-revenue-adjustment-ledger#add-a-single-earned-revenue-adjustment)
* [Add a Recurring Earned Revenue Adjustment](/projects/earned-revenue-adjustment-ledger#add-a-recurring-earned-revenue-adjustment)
#### Add a Single Earned Revenue Adjustment
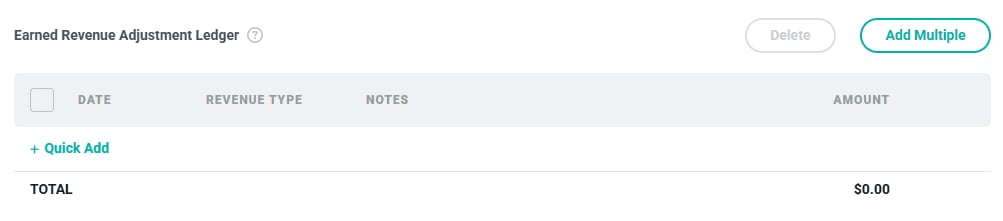
To add a single earned revenue adjustment, simply click on the **+ Quick Add** button at the bottom of the **Earned Revenue Adjustment Ledger** (Figure 2).
### Creating Adjustments to Earned Revenue
The **Earned Revenue Adjustment Ledger** is at the bottom of the **Accounting** tab of the **Edit Project** drawer. This ledger allows you to adjust the earned revenue for all types of revenue, including services, expenses, products, and other items. Adjustments to earned revenue can be either positive or negative.
Adjustments to earned revenue are not invoiced to clients as they simply impact the calculation for the specified type of earned revenue. Accordingly, they do not change the invoiced revenue amount. Adjustments to earned revenue are reflected on Ruddr dashboards and reports.
There are two ways to add adjustments to the **Earned Revenue Adjustment Ledger** on the **Edit Project** drawer:
* [Add a Single Earned Revenue Adjustment](/projects/earned-revenue-adjustment-ledger#add-a-single-earned-revenue-adjustment)
* [Add a Recurring Earned Revenue Adjustment](/projects/earned-revenue-adjustment-ledger#add-a-recurring-earned-revenue-adjustment)
#### Add a Single Earned Revenue Adjustment
To add a single earned revenue adjustment, simply click on the **+ Quick Add** button at the bottom of the **Earned Revenue Adjustment Ledger** (Figure 2).
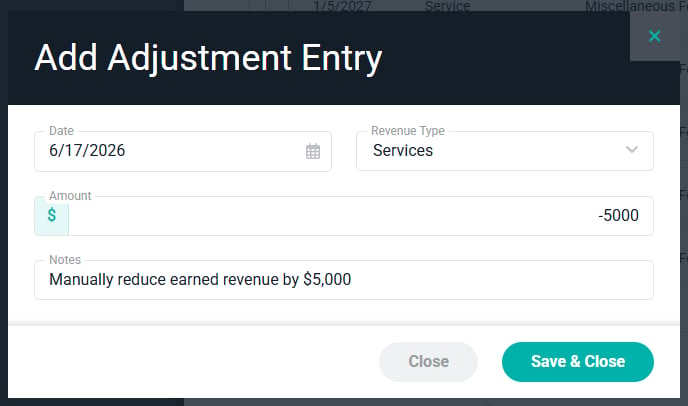
 This will open the **Add Adjustment Entry** window (Figure 3) where you can supply the information about the adjustment.
You can provide the following fields:
* **Date** - The date that you want the earned revenue adjustment to impact Ruddr reports and dashboards.
* **Revenue Type** - The type of revenue that you are adjusting. This could be services, expenses, products, or other items.
* **Amount** - The amount of the earned revenue adjustment. This could be either positive or negative.
* **Notes** - The description or reason for the earned revenue adjustment.
This will open the **Add Adjustment Entry** window (Figure 3) where you can supply the information about the adjustment.
You can provide the following fields:
* **Date** - The date that you want the earned revenue adjustment to impact Ruddr reports and dashboards.
* **Revenue Type** - The type of revenue that you are adjusting. This could be services, expenses, products, or other items.
* **Amount** - The amount of the earned revenue adjustment. This could be either positive or negative.
* **Notes** - The description or reason for the earned revenue adjustment.
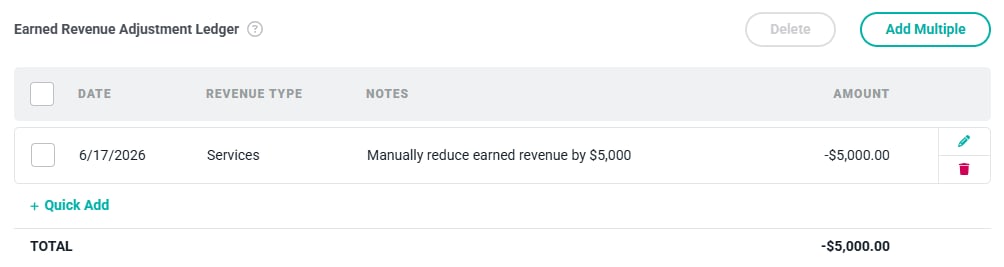
 Clicking the **Save & Close** button on the **Add Adjustment Entry** window will close the form and add the adjustment to the ledger (Figure 4).
 #### Add a Recurring Earned Revenue Adjustment
If you need to have a monthly recurring adjustment, you can create these via the **Add Multiple** button at the top of the **Earned Revenue Adjustments Ledger** (Figure 2). This will open the **Add Adjustment Entries** window (Figure 5).
#### Add a Recurring Earned Revenue Adjustment
If you need to have a monthly recurring adjustment, you can create these via the **Add Multiple** button at the top of the **Earned Revenue Adjustments Ledger** (Figure 2). This will open the **Add Adjustment Entries** window (Figure 5).
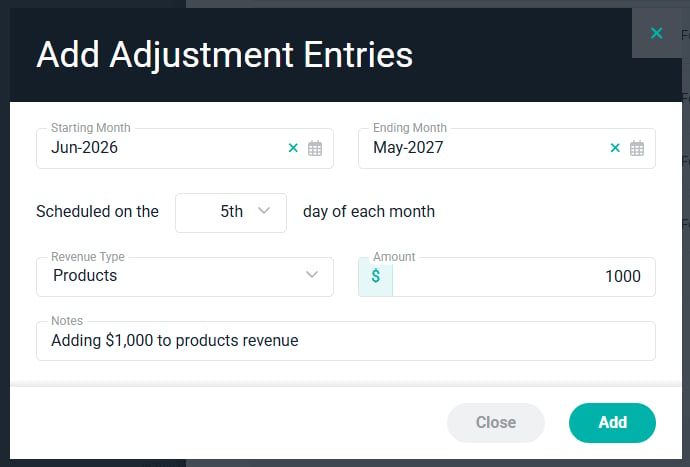 On this window, the fields are identical to the single **Add Adjustment Entry** window (Figure 3), with the exception of the following:
* **Starting Month** - The first month that you want this adjustment to be applied.
* **Ending Month** - The final month that you want this adjustment to be applied.
* **Scheduled on the X Day of Each Month** - The exact day of the month that you want this adjustment to be applied.
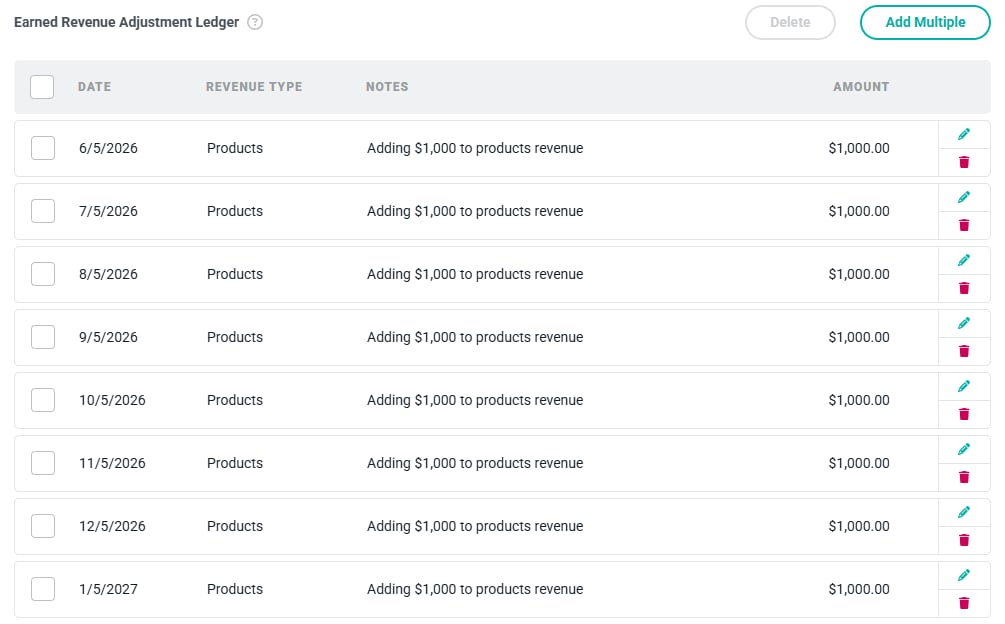
Once you have provided the information for the recurring adjustment schedule, click the **Add** button at the bottom of the **Add Adjustment Entries** window (Figure 5). This will close the window and add the full revenue adjustment schedule to the **Earned Revenue Adjustment Ledger** (Figure 6).
The individual rows can be edited or deleted via the buttons on the right side of each row.
On this window, the fields are identical to the single **Add Adjustment Entry** window (Figure 3), with the exception of the following:
* **Starting Month** - The first month that you want this adjustment to be applied.
* **Ending Month** - The final month that you want this adjustment to be applied.
* **Scheduled on the X Day of Each Month** - The exact day of the month that you want this adjustment to be applied.
Once you have provided the information for the recurring adjustment schedule, click the **Add** button at the bottom of the **Add Adjustment Entries** window (Figure 5). This will close the window and add the full revenue adjustment schedule to the **Earned Revenue Adjustment Ledger** (Figure 6).
The individual rows can be edited or deleted via the buttons on the right side of each row.